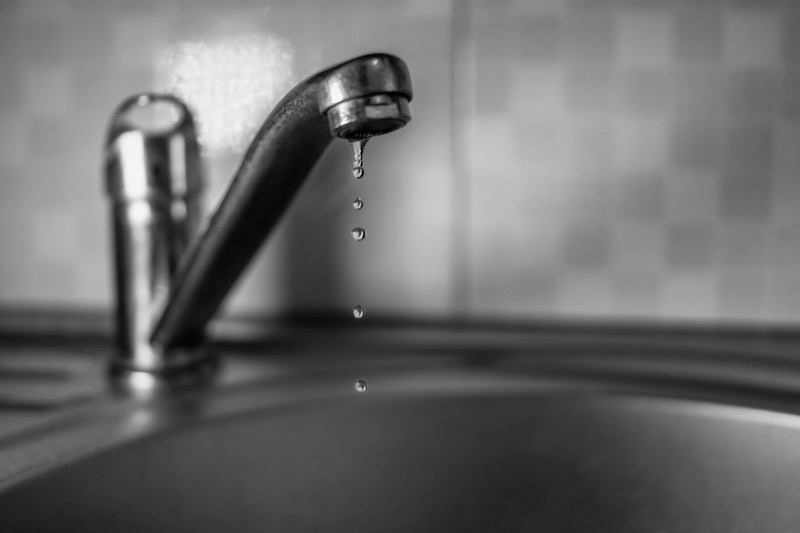
Listen up, folks! If you've ever woken up to the annoying drip-drip-drip of a leaking faucet, you're not alone. It’s one of those pesky little problems that can drive anyone crazy. But here’s the good news: fixing a leaking faucet isn’t as hard as you might think. With the right tools and a bit of know-how, you can save yourself some serious cash and avoid calling in a plumber. Plus, fixing it yourself gives you that sweet sense of accomplishment, right?
Let’s face it, a dripping faucet isn’t just annoying; it can also waste a ton of water over time. Did you know that a single leaky faucet can waste up to 3,000 gallons of water per year? That’s a lot of wasted resources and money down the drain—literally! So, if you’re ready to tackle this DIY project and stop that relentless dripping sound, you’ve come to the right place.
This guide will walk you through everything you need to know about how to fix a leaking faucet. From understanding the common causes of leaks to step-by-step instructions, we’ve got you covered. Whether you’re a seasoned DIYer or a total beginner, we’ll make sure you’re equipped with all the info you need to get the job done right.
Read also:Sketch Gay Leaks The Untold Story You Need To Know
Table of Contents
Common Causes of a Leaking Faucet
Step-by-Step Guide to Fixing a Leaky Faucet
Read also:Sydney Thomas Leaked The Inside Story You Need To Know
Pro Tips for a Successful Repair
Tools You’ll Need to Fix a Leaking Faucet
Before you dive into fixing your leaking faucet, it’s important to gather all the necessary tools. You don’t want to be halfway through the job and realize you’re missing something crucial. Here’s a quick rundown of what you’ll need:
- Adjustable wrench
- Plumber’s tape
- Screwdriver (Phillips or flathead, depending on your faucet)
- Replacement parts (like washers, O-rings, or cartridges)
- Towel or cloth (to catch water and protect surfaces)
- Gloves (optional, but recommended for a cleaner repair)
Having these tools on hand will make the process smoother and more efficient. Trust me, you don’t want to be fumbling around looking for the right wrench while water is still dripping everywhere.
Common Causes of a Leaking Faucet
Now, let’s talk about why your faucet might be leaking in the first place. Understanding the root cause is key to fixing the problem effectively. Here are some of the most common culprits:
Worn-Out Washers
Washers are those little rubber or plastic discs inside your faucet that help create a tight seal. Over time, they can wear out or become misshapen, leading to leaks. Replacing them is usually a quick fix.
Corroded O-Rings
O-rings are small rubber rings that help keep water from leaking around the faucet’s stem. If they get old or damaged, they can cause leaks. Luckily, replacing them is pretty straightforward.
Broken Cartridge
If you have a cartridge faucet, a damaged or worn-out cartridge could be the issue. These cartridges control the flow of water and can degrade over time, especially with hard water usage.
How to Diagnose the Problem
Figuring out what’s causing your faucet to leak is half the battle. Here’s how you can diagnose the issue:
First, turn off the water supply under the sink. This will prevent water from flowing while you’re working. Next, disassemble the faucet carefully, taking note of how everything fits together. Once you’ve got it apart, inspect the components for signs of wear and tear. Look for cracked or worn-out parts, and replace them as needed.
If you’re still unsure, don’t worry! We’ll go into more detail in the next section about how to fix each specific issue.
Step-by-Step Guide to Fixing a Leaky Faucet
Alright, let’s get down to business. Here’s a step-by-step guide to fixing your leaking faucet:
Step 1: Turn Off the Water Supply
This is crucial! You don’t want water spraying everywhere while you’re trying to fix the problem. Locate the shut-off valves under the sink and turn them off. If you can’t find them, you might need to turn off the main water supply to your house.
Step 2: Remove the Faucet Handle
Use a screwdriver to remove the screw holding the handle in place. Sometimes, there’s a decorative cap covering the screw, so you might need to pry it off gently with a flathead screwdriver.
Step 3: Inspect the Components
Once the handle is off, you’ll have access to the internal parts of the faucet. Check the washer, O-ring, and cartridge for any signs of damage. Replace any worn-out parts with new ones that match your faucet model.
Step 4: Reassemble the Faucet
Carefully put the faucet back together, making sure everything is tight but not overtightened. Turn the water supply back on and test the faucet to see if the leak is fixed.
Preventative Maintenance Tips
Prevention is always better than cure. Here are a few tips to keep your faucet in good condition and prevent future leaks:
- Regularly check for signs of wear and tear, such as mineral deposits or corrosion.
- Use vinegar or a descaling solution to remove hard water stains and mineral buildup.
- Don’t overtighten the handles when turning the water off or on.
- Consider installing a water softener if you live in an area with hard water.
By following these simple tips, you can extend the lifespan of your faucet and avoid costly repairs down the line.
Cost of Fixing a Leaky Faucet
One of the best things about fixing a leaking faucet yourself is the cost savings. Depending on the extent of the damage, you could spend anywhere from $5 to $50 on replacement parts. Compare that to the $100-$200 you might pay a plumber, and it’s a no-brainer!
Of course, if the problem is more complex or requires specialized tools, it might be worth calling in a professional. But for most common issues, DIY repairs are a great option.
FAQs About Leaky Faucets
Got questions? We’ve got answers! Here are some of the most frequently asked questions about leaky faucets:
Q: How long does it take to fix a leaking faucet?
A: Most repairs can be done in under an hour, depending on the complexity of the issue.
Q: Can I fix a leaking faucet without turning off the water?
A: Not recommended! Turning off the water supply is essential to avoid water damage and make the repair process easier.
Q: What if the leak keeps coming back?
A: If the leak persists after replacing parts, there might be a more serious issue with the faucet or plumbing. It’s time to call in a professional.
Pro Tips for a Successful Repair
Here are a few extra tips to ensure your repair goes smoothly:
- Take photos of the faucet before disassembling it. This can help you remember how everything fits together.
- Keep spare parts on hand for future repairs. It’s always good to have replacements for common components like washers and O-rings.
- Use plumber’s tape on threaded connections to create a better seal and prevent leaks.
These little tricks can make a big difference in the success of your repair.
Safety Tips to Keep in Mind
While fixing a leaking faucet is generally a safe DIY project, there are a few safety precautions to keep in mind:
- Always turn off the water supply before starting any work.
- Be careful when handling sharp tools to avoid injury.
- Wear gloves to protect your hands from dirt and grime.
By following these safety tips, you can ensure a safe and successful repair.
Conclusion
Fixing a leaking faucet might seem intimidating at first, but with the right tools and knowledge, it’s a task that almost anyone can tackle. From understanding the common causes of leaks to following step-by-step repair instructions, this guide has equipped you with everything you need to get the job done.
Remember, preventing future leaks is just as important as fixing current ones. By practicing regular maintenance and keeping an eye on your faucet’s condition, you can save yourself time, money, and frustration in the long run.
So, what are you waiting for? Grab your tools and get to work! And don’t forget to share this guide with your friends and family so they can tackle their own leaking faucets. Together, we can stop those annoying drips once and for all!