Hey there, homeowners! Are you dealing with that annoying leaking faucet bathroom issue? You're not alone, my friend. A dripping faucet might seem like a minor problem, but it can lead to significant water wastage and even higher utility bills. Before we dive deep into the nitty-gritty of fixing this pesky problem, let me tell you something – a leaking faucet bathroom isn’t just about a few drops of water; it’s a sign that something bigger might be wrong with your plumbing system.
Now, you might be thinking, "Why should I care about a little drip?" Well, here's the deal: even a small drip can waste up to 20 gallons of water per day! That’s a lot of wasted resources, not to mention the potential damage to your bathroom fixtures and floors. So, buckle up because we’re about to break down everything you need to know about leaking faucets, from identifying the problem to fixing it like a pro.
In this guide, we’ll cover all the essentials, including how to fix a leaking faucet bathroom, common causes, and preventive measures. By the end of this article, you’ll have the confidence to tackle this issue yourself or at least know when it’s time to call in the experts. Let’s get started, shall we?
Read also:Ice Spice Porn Leak The Truth Behind The Scandal
Here’s a quick overview of what we’ll be covering:
- Understanding the Common Causes of Leaking Faucet Bathroom
- Step-by-Step Guide to Fixing a Leaking Faucet
- Tools and Materials You’ll Need
- Preventive Measures to Avoid Future Leaks
- When to Call a Professional Plumber
- Cost Breakdown for Fixing and Replacing a Faucet
- Environmental Impact of Leaking Faucets
- DIY Tips for Maintaining Your Bathroom Fixtures
- How to Choose the Right Replacement Faucet
- Final Thoughts and Call to Action
Understanding the Common Causes of Leaking Faucet Bathroom
Before you start tearing apart your bathroom sink, it’s essential to understand why your faucet is leaking in the first place. A leaking faucet bathroom isn’t always caused by a major plumbing issue; sometimes, it’s as simple as a worn-out washer or O-ring. Here are some of the most common culprits:
Worn-Out Washers
One of the main reasons your faucet is leaking is due to worn-out washers. Over time, these little rubber or plastic discs can wear down, causing water to seep through. Replacing them is usually a quick and easy fix that doesn’t require much plumbing expertise.
Corroded O-Rings
O-rings are small rubber rings that help create a tight seal between the faucet handle and the stem. If these rings corrode or become misshapen, water can leak around the handle. Luckily, replacing an O-ring is just as simple as replacing a washer.
Mineral Deposits
If you live in an area with hard water, mineral deposits can build up inside your faucet, causing leaks. These deposits can clog the aerator or damage internal components, leading to that dreaded drip. Regular cleaning and descaling can help prevent this issue.
Step-by-Step Guide to Fixing a Leaking Faucet
Alright, let’s get our hands dirty! Fixing a leaking faucet bathroom isn’t as daunting as it seems. With the right tools and a bit of patience, you can save yourself a ton of money by doing it yourself. Follow these steps to fix that pesky drip:
Read also:Rachel Dolezal Onlyfans Leak The Untold Story Behind The Controversy
Gather Your Tools and Materials
Before you begin, make sure you have all the necessary tools and materials on hand. Here’s what you’ll need:
- adjustable wrench
- screwdriver (Phillips or flathead, depending on your faucet)
- pliers
- replacement washers and O-rings
- plumber’s tape
- vinegar or descaling solution (for mineral deposits)
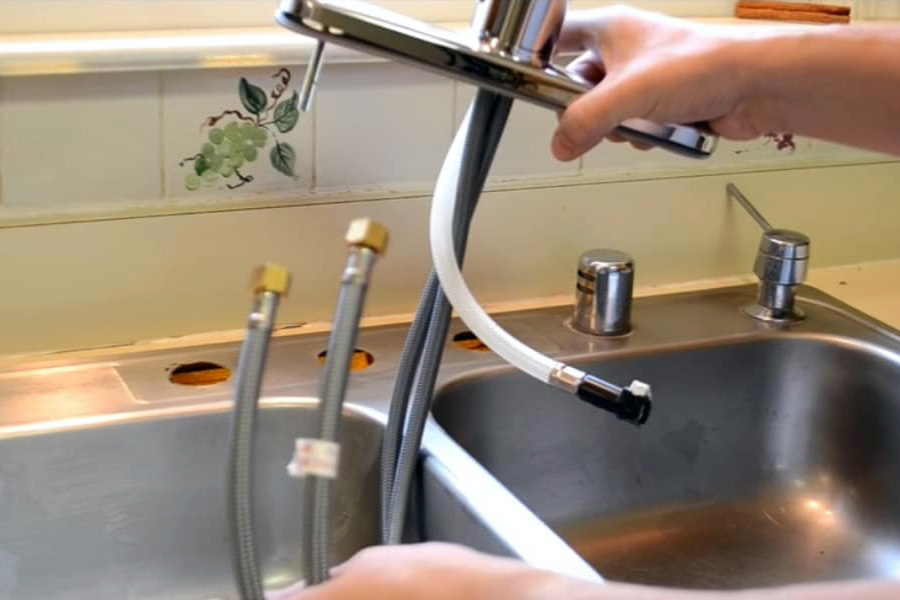
Step 1: Turn Off the Water Supply
Safety first, folks! Before you start disassembling your faucet, make sure to turn off the water supply under the sink. If there’s no shut-off valve, you’ll need to turn off the main water supply to your house. Trust me, you don’t want water spraying everywhere while you’re trying to fix the leak.
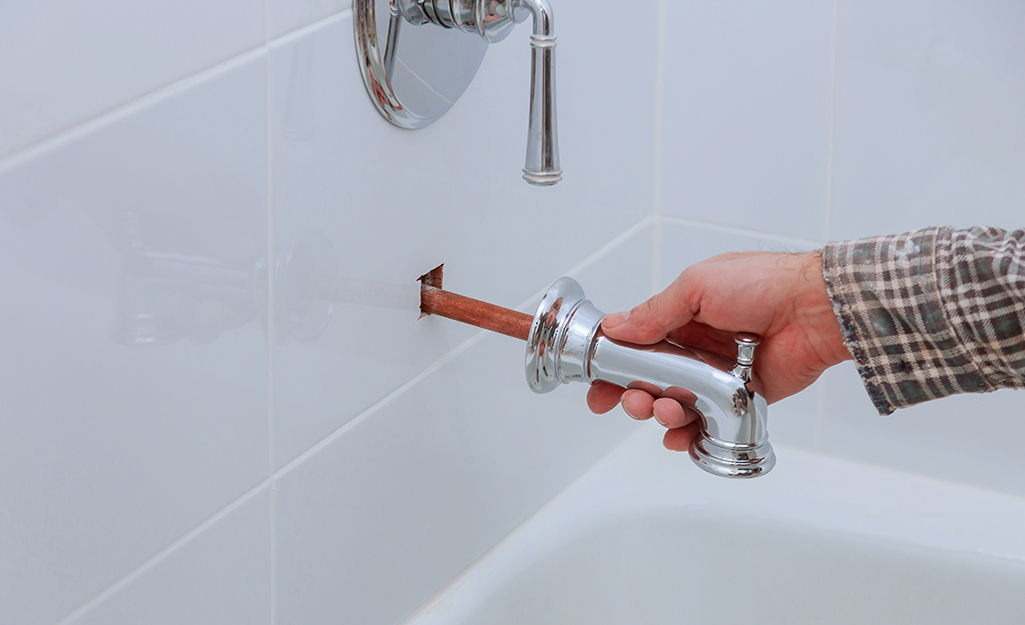
Step 2: Remove the Faucet Handle
Most faucet handles are held in place by a small screw or cap. Use a screwdriver to remove the handle and expose the inner workings of the faucet. Be gentle – you don’t want to damage any of the components.
Step 3: Inspect the Washer and O-Ring
Once you’ve removed the handle, check the washer and O-ring for signs of wear and tear. If they’re cracked, worn, or misshapen, replace them with new ones that match the size and type of your faucet. This is usually the source of the leak, so replacing these parts can often solve the problem.
Step 4: Clean Mineral Deposits
If the washer and O-ring look fine, the issue might be mineral deposits. Soak the faucet parts in vinegar or use a descaling solution to remove any buildup. This will help restore the faucet’s functionality and prevent future leaks.
Tools and Materials You’ll Need
Having the right tools and materials on hand is crucial for fixing a leaking faucet bathroom. Here’s a quick rundown of what you’ll need:
- Adjustable wrench for tightening connections
- Screwdrivers for removing faucet handles
- Replacement washers and O-rings
- Plumber’s tape for sealing threads
- Vinegar or descaling solution for cleaning mineral deposits
Preventive Measures to Avoid Future Leaks
Prevention is key when it comes to maintaining your bathroom fixtures. Here are some tips to help you avoid future leaks:
Regular Inspections
Make it a habit to inspect your faucets regularly for signs of wear and tear. Catching a problem early can save you a lot of hassle down the road.
Descale Your Faucet
As mentioned earlier, mineral deposits can cause leaks and reduce the lifespan of your faucet. Regular descaling can help keep your fixtures in top condition.
Use High-Quality Parts
When replacing washers or O-rings, always go for high-quality parts. Cheaper alternatives might seem like a good deal, but they can lead to more problems in the long run.
When to Call a Professional Plumber
While fixing a leaking faucet bathroom is usually a DIY-friendly task, there are times when it’s best to call in the professionals. If you’ve tried all the troubleshooting steps and the leak persists, it might be time to seek help. A plumber can diagnose more complex issues and ensure your plumbing system is in good working order.
Cost Breakdown for Fixing and Replacing a Faucet
Fixing a leaking faucet bathroom doesn’t have to break the bank. Here’s a rough cost breakdown:
- Replacement washers and O-rings: $5-$10
- Descaling solution: $10-$15
- Professional plumber: $50-$100 per hour
- Replacement faucet: $50-$200 (depending on quality and brand)
Environmental Impact of Leaking Faucets
Did you know that a single leaking faucet bathroom can waste thousands of gallons of water per year? This not only affects your wallet but also has a significant impact on the environment. Conserving water is crucial for sustainability, and fixing leaks is one of the easiest ways to do your part.
DIY Tips for Maintaining Your Bathroom Fixtures
Here are some additional DIY tips to keep your bathroom fixtures in tip-top shape:
- Clean your faucet regularly to prevent mineral buildup
- Check for leaks monthly and address them promptly
- Use plumber’s tape on all threaded connections for a tight seal
- Consider upgrading to a water-efficient faucet for better conservation
How to Choose the Right Replacement Faucet
If your current faucet is beyond repair, it might be time to upgrade. When choosing a new faucet, consider factors like style, finish, and water efficiency. Look for models with the WaterSense label, which indicates they meet EPA standards for water conservation.
Final Thoughts and Call to Action
There you have it, folks – a comprehensive guide to fixing and preventing leaking faucet bathroom issues. Remember, a small drip today can turn into a major problem tomorrow, so it’s always best to address leaks as soon as you notice them. By following the steps outlined in this article, you can save money, conserve water, and keep your bathroom looking great.
Now it’s your turn! Have you ever dealt with a leaking faucet bathroom? Share your experience in the comments below, or let us know if you have any questions. And don’t forget to check out our other articles for more home improvement tips and tricks. Happy fixing, and may your faucets never drip again!