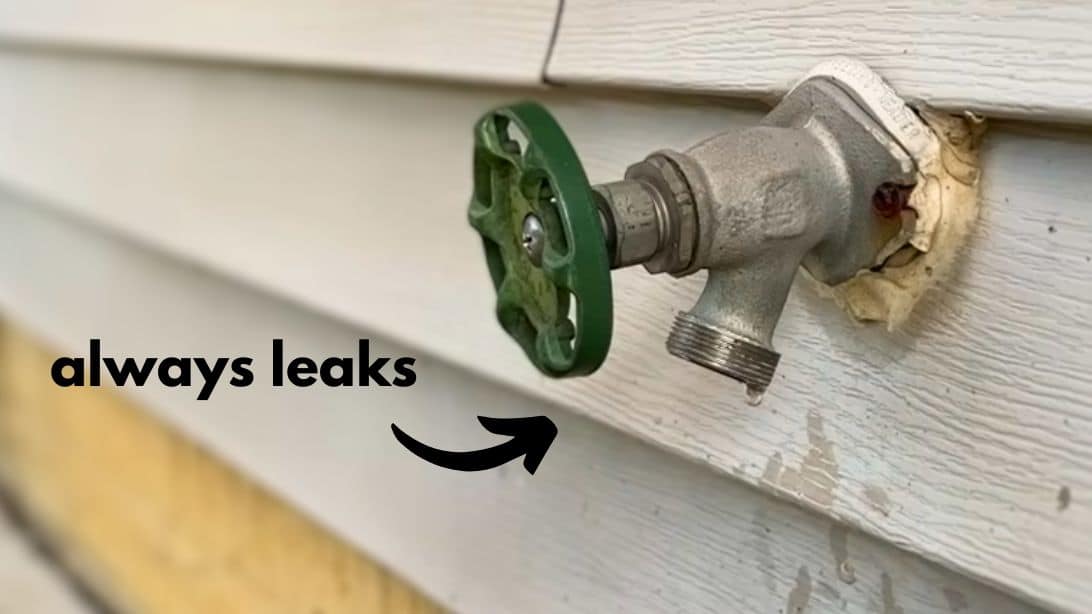
Dealing with a leaking outdoor faucet might seem like a small issue, but trust me, it can quickly escalate into a major headache if you don't address it properly. Whether it's a slow drip or a steady stream, that pesky leak is not only wasting water but could also be costing you money. So, let’s dive into this topic and figure out how to fix it without losing your cool.
Picture this: you’re out in the yard, enjoying some fresh air, and suddenly you notice a puddle forming near your outdoor faucet. You check it out, and sure enough, there’s a leak. Now, before you panic, take a deep breath. Fixing a leaking outdoor faucet isn’t rocket science, but it does require some knowledge and tools. That’s where we come in.
In this guide, we’ll break down everything you need to know about dealing with a leaking outdoor faucet. From understanding the common causes to step-by-step fixes, we’ve got your back. So grab your toolkit, and let’s get started on solving this plumbing puzzle.
Read also:Jessica Alba Leaked The Truth Behind The Controversy
Understanding the Basics of Outdoor Faucets
Before we dive into fixing the leak, it’s essential to understand how outdoor faucets work. These fixtures, also known as spigots or hose bibbs, are designed to provide easy access to water outside your home. They come in various designs, but most operate similarly. Knowing the basics will help you identify the problem and find the right solution.
Types of Outdoor Faucets
Not all outdoor faucets are created equal. Here’s a quick rundown of the most common types:
- Compression Faucets: These rely on a washer to stop the flow of water. Over time, the washer can wear out, leading to leaks.
- Ball Faucets: These have a single handle and use a ball mechanism to control water flow. They’re less common outdoors but still worth mentioning.
- Ceramic Disk Faucets: These are durable and long-lasting, making them a popular choice for outdoor use. They rarely leak unless damaged.
Knowing which type of faucet you have can help you troubleshoot more effectively. Now, let’s move on to the main culprit behind those annoying leaks.
Common Causes of a Leaking Outdoor Faucet
A leaky outdoor faucet can be caused by several factors. Here are the top reasons why your spigot might be dripping:
Worn-Out Washers
One of the most common issues is a worn-out washer. Over time, the washer inside the faucet can degrade, causing water to seep out. Replacing the washer is usually a quick fix, but it requires some basic plumbing skills.
Broken O-Rings
Another common problem is a damaged O-ring. The O-ring is a small rubber seal that helps keep water from leaking. If it’s cracked or worn, it can lead to leaks. Replacing the O-ring is a straightforward process, but it’s crucial to get the right size.
Read also:Taylor Hudson Leak The Untold Story Behind The Hype
Freeze Damage
Living in a colder climate? Freeze damage could be the reason behind your leak. When water inside the pipe freezes, it expands, potentially causing cracks or breaks in the faucet or pipe. Insulating your outdoor faucets during winter can prevent this issue.
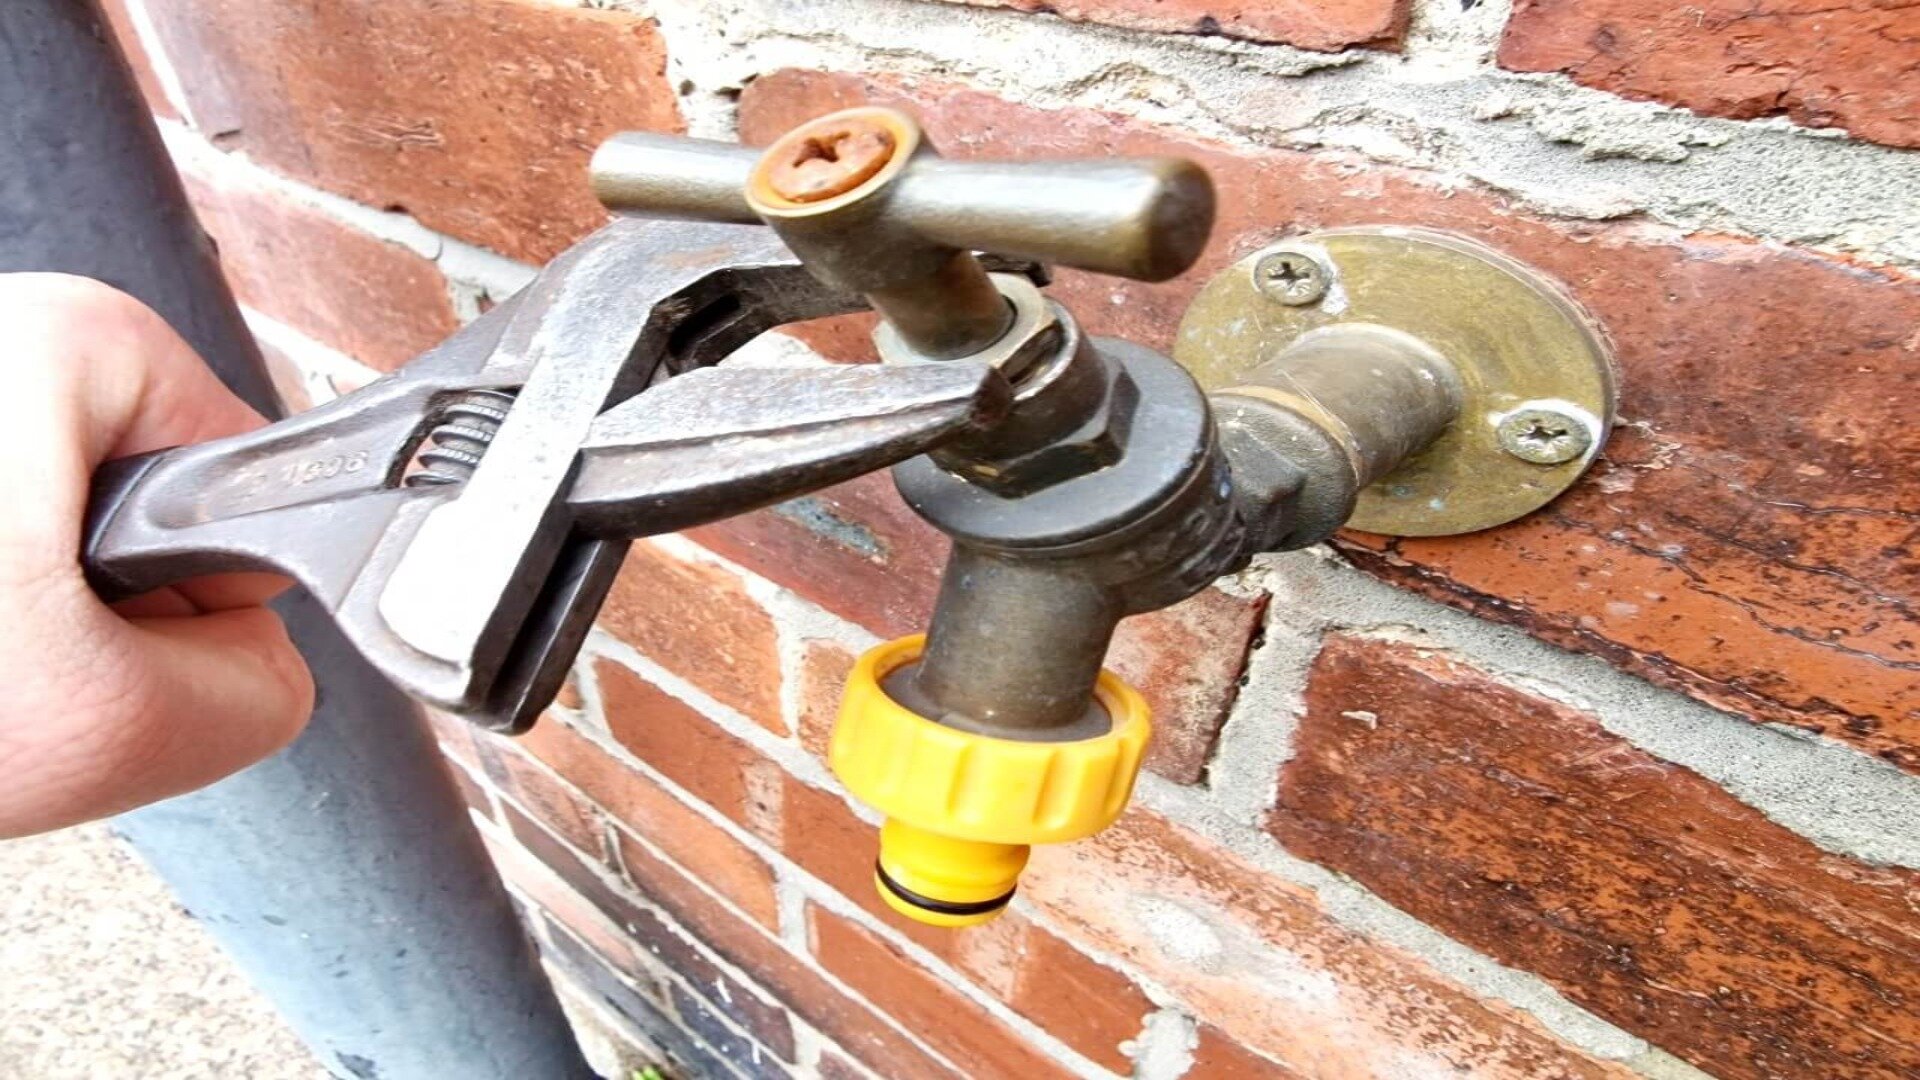
Tools You’ll Need to Fix a Leaking Outdoor Faucet
Fixing a leaking outdoor faucet doesn’t require a lot of fancy equipment. Here’s a list of tools you’ll need:
- adjustable wrench
- screwdriver (Phillips or flathead, depending on your faucet)
- replacement washers or O-rings
- plumber’s tape
- WD-40 (optional, for stubborn parts)
Having these tools on hand will make the repair process much smoother. Now that we’ve got the basics covered, let’s dive into the steps to fix your leaking faucet.
Step-by-Step Guide to Fix a Leaking Outdoor Faucet
Fixing a leaking outdoor faucet is easier than you might think. Follow these steps, and you’ll have your faucet back in working order in no time.
Step 1: Turn Off the Water Supply
Before you start tinkering with the faucet, make sure to turn off the water supply. This is usually done by locating the shut-off valve inside your home, near where the outdoor faucet connects to the plumbing system. Once you’ve turned off the water, open the faucet to release any remaining pressure.
Step 2: Disassemble the Faucet
Using your wrench or screwdriver, carefully disassemble the faucet. Start by removing the handle, then take off the packing nut and stem. Be gentle, as some parts might be old and brittle.
Step 3: Inspect and Replace Parts
Once the faucet is apart, inspect the washer and O-ring. If they’re worn or damaged, replace them with new ones. Make sure to get the correct size; a mismatched part can lead to more leaks.
Step 4: Reassemble the Faucet
After replacing the necessary parts, reassemble the faucet in reverse order. Tighten everything securely but avoid over-tightening, as this can cause damage.
Step 5: Test the Faucet
Turn the water supply back on and test the faucet. If the leak persists, double-check your work. Sometimes a small adjustment can make all the difference.
Preventing Future Leaks
Fixing a leak is great, but preventing future issues is even better. Here are some tips to keep your outdoor faucet in tip-top shape:
- Insulate your faucets during winter months to prevent freeze damage.
- Regularly check for signs of wear and tear, such as rust or corrosion.
- Replace washers and O-rings every few years as a preventative measure.
- Consider installing a frost-proof faucet if you live in a cold climate.
By taking these proactive steps, you can avoid the hassle of dealing with leaks in the future.
When to Call a Professional
While many leaks can be fixed with a bit of DIY know-how, sometimes it’s best to call in the experts. If you’ve tried everything and the leak persists, or if the damage is extensive, a professional plumber can help. They have the tools and expertise to handle more complex repairs, ensuring your outdoor faucet is functioning properly.
Signs You Need Professional Help
Here are some signs that it’s time to call a plumber:
- The faucet is severely damaged or cracked.
- The leak is coming from the pipe, not the faucet itself.
- You’re unsure about how to proceed with the repair.
Don’t hesitate to reach out for help if you’re in over your head. It’s better to spend a little extra now than to risk further damage down the line.
Cost of Fixing a Leaking Outdoor Faucet
The cost of fixing a leaking outdoor faucet can vary depending on the extent of the damage and whether you tackle it yourself or hire a professional. Here’s a rough estimate:
DIY Repair Costs
If you choose to fix the leak yourself, the costs will be minimal. Replacement washers and O-rings are usually inexpensive, ranging from $1 to $5. Add in the cost of plumber’s tape and any other small tools, and you’re looking at a total of around $10-$20.
Professional Repair Costs
Hiring a plumber will obviously cost more. On average, you can expect to pay between $100 and $200 for a professional repair, depending on the complexity of the job and the plumber’s rates in your area.
Environmental Impact of Leaking Faucets
While a small leak might not seem like a big deal, the environmental impact can be significant. A single dripping faucet can waste hundreds of gallons of water per year. In a world where water conservation is more important than ever, fixing leaks is a simple way to make a positive impact.
Ways to Conserve Water
Here are some additional tips to conserve water:
- Fix leaks promptly to prevent waste.
- Use drought-resistant plants in your landscaping.
- Collect rainwater for watering plants.
Every little bit helps when it comes to protecting our planet’s precious resources.
Conclusion
Dealing with a leaking outdoor faucet doesn’t have to be a daunting task. By understanding the common causes and following a step-by-step guide, you can fix the issue yourself and save money in the process. Remember to take preventative measures to avoid future leaks and consider the environmental impact of water waste.
So, what are you waiting for? Grab your tools and get to work. And don’t forget to share this guide with your friends and family. Who knows? You might just inspire someone else to tackle their own plumbing project.
Table of Contents
- Understanding the Basics of Outdoor Faucets
- Common Causes of a Leaking Outdoor Faucet
- Tools You’ll Need to Fix a Leaking Outdoor Faucet
- Step-by-Step Guide to Fix a Leaking Outdoor Faucet
- Preventing Future Leaks
- When to Call a Professional
- Cost of Fixing a Leaking Outdoor Faucet
- Environmental Impact of Leaking Faucets
- Conclusion