So you’ve got a single-handle faucet that just won’t stop dripping. You know the drill—it’s annoying, it’s wasteful, and let’s be honest, it’s keeping you up at night. But here’s the good news: fixing a leaky single-handle faucet isn’t as hard as you think. In fact, with the right tools and a bit of know-how, you can get that annoying drip under control in no time. And who knows? You might even impress your friends with your newfound plumbing skills.
Now, before we dive into the nitty-gritty of how to fix leaky faucet single handle, let’s talk about why it matters. A dripping faucet isn’t just an inconvenience—it’s also costing you money. According to the EPA, a single leaky faucet can waste up to 3,000 gallons of water per year. That’s a lot of wasted H2O, and it adds up on your water bill faster than you’d think. So, whether you’re doing it for the environment or your wallet, fixing that leaky faucet is a smart move.
And hey, don’t worry if you’re not a professional plumber. This guide is here to walk you through every step, from diagnosing the problem to tightening the last screw. By the end of this, you’ll be a faucet-fixing pro. Ready to get started? Let’s go!
Read also:Jennifer Lopez Leak The Inside Scoop You Need To Know
Table of Contents
- Understanding the Single-Handle Faucet
- Tools You’ll Need
- Diagnosing the Leak
- Fixing a Cartridge Faucet
- Fixing a Ball Faucet
- Fixing a Ceramic Disk Faucet
- Fixing a Compression Faucet
- Preventing Future Leaks
- Cost Considerations
- Frequently Asked Questions
Understanding the Single-Handle Faucet
Alright, let’s start with the basics. A single-handle faucet is exactly what it sounds like—a faucet with just one handle that controls both the water flow and temperature. Sounds simple enough, right? But here’s the thing: there are actually several types of single-handle faucets, and understanding which one you have is key to fixing it properly.
Most single-handle faucets fall into one of these categories: cartridge, ball, ceramic disk, or compression. Each type works a little differently, and the repair process can vary depending on the design. Don’t worry—we’ll break it all down for you.
Why Do Faucets Leak?
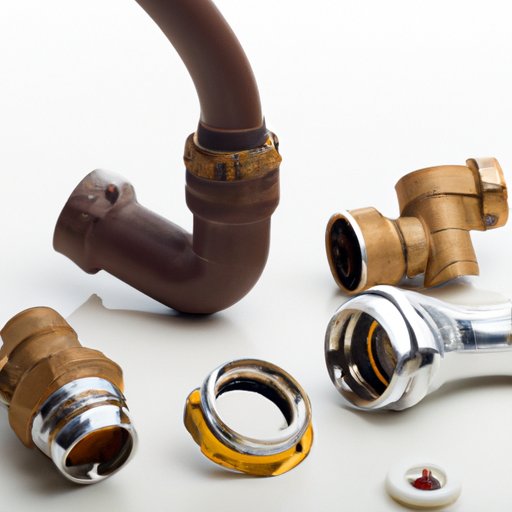
Leaky faucets are usually caused by wear and tear. Over time, the internal components of your faucet can degrade, leading to leaks. Common culprits include worn-out O-rings, corroded valve seats, or damaged cartridges. Sometimes, it’s as simple as a loose screw or a clogged aerator. But whatever the cause, the good news is that most leaks can be fixed without calling in a professional.
Tools You’ll Need
Before you start tinkering with your faucet, make sure you’ve got the right tools. You don’t want to be halfway through the job and realize you’re missing something important. Here’s a list of essentials:
- Adjustable wrench
- Phillips and flathead screwdrivers
- Plumber’s putty
- Replacement parts (O-rings, cartridges, etc.)
- Bucket or towel to catch water
- Teflon tape
Pro tip: If you’re not sure what replacement parts you need, bring the old ones to your local hardware store. The staff there can usually help you find the right match.
Diagnosing the Leak
Now that you’ve got your tools ready, it’s time to figure out what’s causing the leak. Start by turning off the water supply under the sink. Trust me, you don’t want to be working with running water. Once the water is off, remove the handle and take a look inside. What do you see?
Read also:Unveiling The Hype All You Need To Know About Leaked Fortnite Skins
Common signs of wear include:
- Cracked or worn-out O-rings
- Corroded valve seats
- Loose or damaged screws
If you’re still not sure what’s causing the leak, don’t worry. We’ll cover each type of faucet in detail later on.
Fixing a Cartridge Faucet
Cartridge faucets are one of the most common types of single-handle faucets. They work by using a cartridge to control water flow and temperature. If your cartridge faucet is leaking, chances are the cartridge itself is the culprit.
Step-by-Step Guide
- Turn off the water supply under the sink.
- Remove the handle by unscrewing the retaining screw. Sometimes, this screw is hidden under a decorative cap—just pop the cap off with a flathead screwdriver.
- Pull out the cartridge. You might need a special cartridge puller for this step.
- Inspect the cartridge for damage or wear. If it looks worn out, replace it with a new one.
- Reassemble the faucet and turn the water supply back on. Test the faucet to make sure the leak is gone.
Fixing a Ball Faucet
Ball faucets are another popular type of single-handle faucet. They use a metal ball to control water flow and temperature. If your ball faucet is leaking, it’s usually due to worn-out seals or a damaged cam.
Step-by-Step Guide
- Turn off the water supply and remove the handle.
- Take out the metal ball and inspect the seals. If they’re worn out, replace them.
- Check the cam for damage. If it’s bent or corroded, replace it.
- Reassemble the faucet and test it to make sure the leak is fixed.
Fixing a Ceramic Disk Faucet
Ceramic disk faucets are a bit more high-tech than their counterparts. They use two ceramic disks to control water flow, and they’re known for their durability. However, even these faucets can develop leaks over time.
Step-by-Step Guide
- Turn off the water supply and remove the handle.
- Take out the cylinder assembly and inspect the ceramic disks. If they’re scratched or damaged, replace them.
- Reassemble the faucet and test it to make sure the leak is gone.
Fixing a Compression Faucet
Compression faucets are less common these days, but they’re still found in older homes. They work by using a rubber washer to stop water flow. If your compression faucet is leaking, it’s probably because the washer is worn out.
Step-by-Step Guide
- Turn off the water supply and remove the handle.
- Unscrew the stem and replace the washer. Make sure the new washer matches the old one.
- Reassemble the faucet and test it to make sure the leak is fixed.
Preventing Future Leaks
Fixing a leaky faucet is one thing, but preventing future leaks is even better. Here are a few tips to keep your faucet in top shape:
- Regularly check for signs of wear, such as corrosion or mineral buildup.
- Use Teflon tape on threaded connections to ensure a tight seal.
- Replace worn-out parts as soon as you notice them.
- Consider upgrading to a more durable faucet if you’re tired of constant repairs.
Cost Considerations
Fixing a leaky faucet doesn’t have to break the bank. Most replacement parts cost less than $10, and the tools you need are probably already in your garage. However, if you’re not comfortable doing the repair yourself, hiring a plumber can cost anywhere from $50 to $150, depending on the job.
Pro tip: If you’re replacing the entire faucet, look for sales or discounts at your local hardware store. You might be surprised at how much you can save.
Frequently Asked Questions
Q: Can I fix a leaky faucet myself?
A: Absolutely! With the right tools and a bit of patience, most faucet repairs are DIY-friendly.
Q: How long does it take to fix a leaky faucet?
A: Most repairs can be done in under an hour, depending on the complexity of the issue.
Q: Should I replace the entire faucet?
A: Only if the faucet is old or beyond repair. Otherwise, replacing the damaged parts is usually sufficient.
Q: What if the leak persists after the repair?
A: If the leak doesn’t go away, it could be a sign of a more serious issue, such as a damaged pipe. In that case, it’s time to call in a professional.
Kesimpulan
And there you have it—everything you need to know about how to fix leaky faucet single handle. Whether you’ve got a cartridge, ball, ceramic disk, or compression faucet, the process is straightforward once you know what you’re doing. Not only will fixing that leak save you money, but it’ll also give you a sense of accomplishment. And hey, who doesn’t love that?
So, what are you waiting for? Grab your tools and get to work. And when you’re done, don’t forget to share your success story in the comments below. Who knows? You might inspire someone else to tackle their own plumbing project. Happy fixing!