Listen up, folks. We all been there—waking up in the middle of the night to that annoying drip-drip-drip from the tub faucet. It’s not just irritating; it’s also costing you money. That's right, a leaky tub faucet can waste gallons of water over time, and nobody wants that on their utility bill. So today, we’re diving deep into how to fix a leaky tub faucet like a pro, even if you’ve never held a wrench before. Let me tell ya, it ain’t as hard as it seems.
Now, before you start thinking about calling a plumber and paying through the nose for something simple, let me break it down for ya. Fixing a leaky tub faucet is totally doable with just a few tools and some basic knowledge. Plus, it’s a great way to save money and feel like MacGyver for the day. Stick around, and I’ll walk you through every step of the process. No fancy jargon, just good old common sense.
And hey, if you’re still unsure about tackling this DIY project, don’t sweat it. By the end of this guide, you’ll have enough info to decide whether you wanna take on the challenge or pass the baton to a professional. So, let’s get started, shall we?
Read also:Sydney Thomas Nude Leak The Truth Behind The Clickbait
Understanding the Problem: What Causes a Leaky Tub Faucet?
First things first, you gotta figure out why your faucet is leaking in the first place. A lot of times, it’s not as complicated as you might think. Most leaks are caused by worn-out parts or improper installation. Here’s a quick rundown of the common culprits:
- Worn-out washers or O-rings
- Corroded valve seats
- Loose or damaged handles
- Mineral buildup from hard water
- Cracked cartridges or faulty cartridges
See? It’s usually something small that can be fixed without breaking the bank. Now, let’s dive into the details so you can identify the problem and get it sorted ASAP.
Tools and Materials You’ll Need
Before you start tinkering with your faucet, make sure you’ve got the right tools and materials. You don’t wanna end up halfway through the job only to realize you’re missing something crucial. Here’s what you’ll need:
- Adjustable wrench
- Flathead and Phillips screwdrivers
- Pliers
- Replacement washers, O-rings, or cartridges (depending on your faucet type)
- Vinegar or descaling solution (for mineral buildup)
- Teflon tape
- A towel or cloth to catch any water or debris
Pro tip: If you’re not sure what parts to get, take a picture of your faucet to the hardware store. The folks there can help you pick out the right replacements.
Step-by-Step Guide: How to Fix a Leaky Tub Faucet
Alright, let’s get our hands dirty—or at least a little greasy. Follow these steps carefully, and you’ll have that leak fixed in no time.
1. Turn Off the Water Supply
This is super important, folks. You don’t wanna be working with live water pressure while you’re fixing the faucet. Locate the shut-off valves under the sink or near the main water supply and turn them off. Double-check by turning the faucet on—if no water comes out, you’re good to go.
Read also:Thousandhunny Patreon Leak What You Need To Know
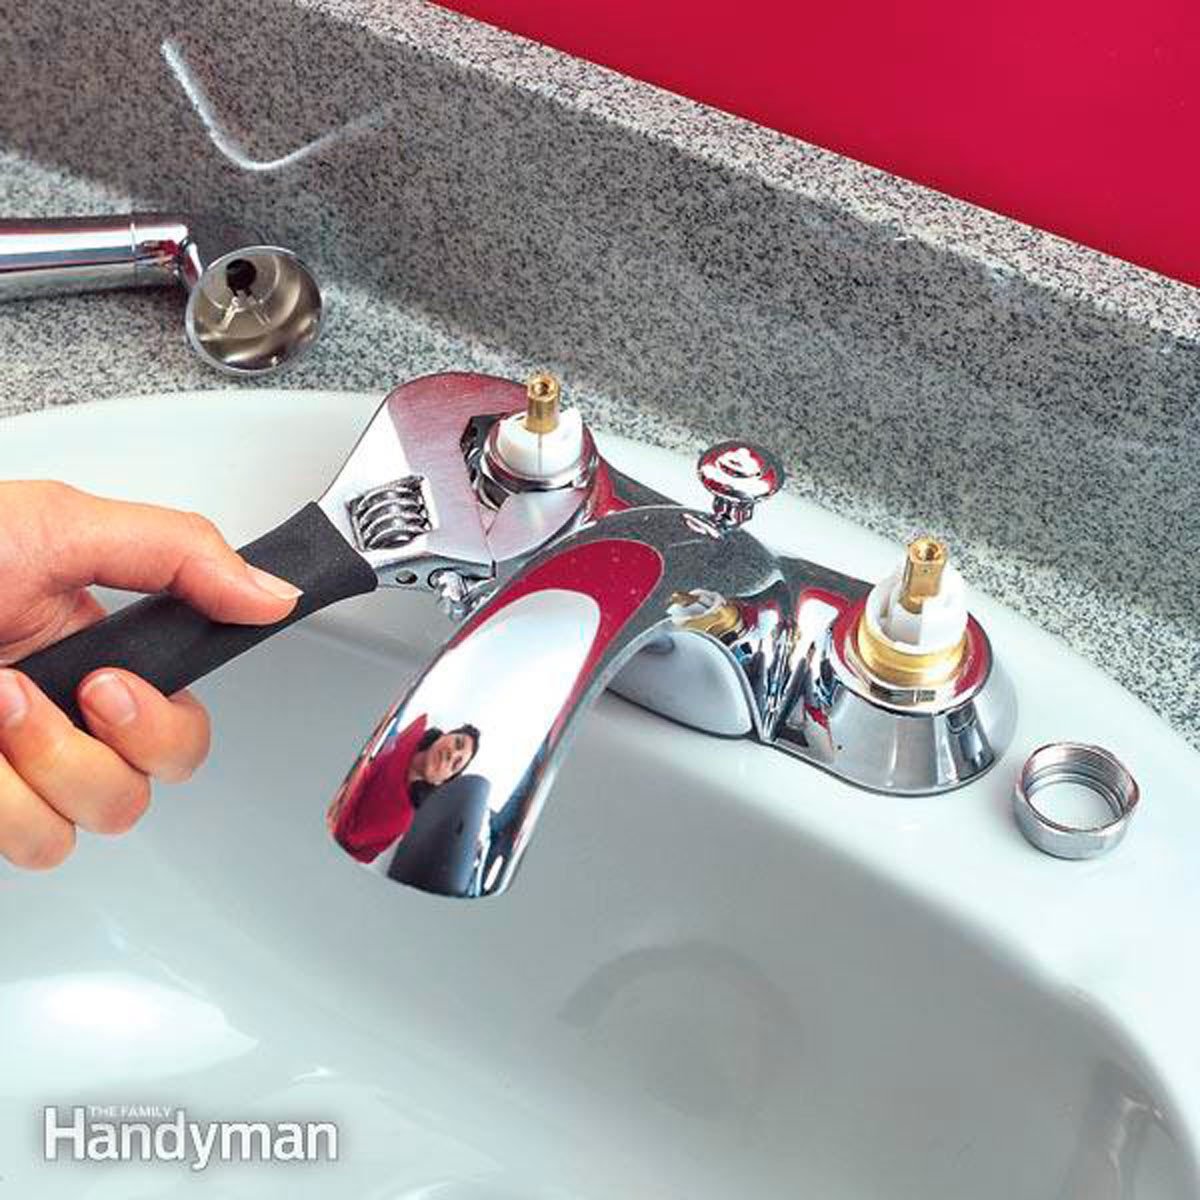
2. Remove the Faucet Handle
Most faucet handles have a set screw or cap that hides the screw. Use a flathead screwdriver to gently pry off the cap, then unscrew the handle using a Phillips screwdriver. If the handle is stuck, use a little WD-40 to loosen it up.
3. Inspect the Washer or O-Ring
Once the handle is off, you’ll see a stem with a washer or O-ring at the bottom. Check if these parts are worn out or damaged. If they are, replace them with new ones. Make sure you get the exact size and type for your faucet.
4. Check the Valve Seat
The valve seat is where the stem connects to the faucet body. Over time, it can corrode or wear out, causing leaks. Use a valve seat wrench to remove the old seat and replace it with a new one. This step might require a trip to the hardware store if you don’t have the right tools.
5. Clean Mineral Buildup
If your faucet has hard water stains or mineral buildup, soak the parts in vinegar overnight. This will dissolve the deposits and make your faucet shine like new. For stubborn buildup, you might need a descaling solution.
6. Reassemble the Faucet
Once you’ve replaced the necessary parts and cleaned everything, it’s time to put the faucet back together. Follow the reverse order of disassembly, making sure everything is tight but not over-tightened. Use Teflon tape on the threads to prevent leaks.
7. Test the Faucet
Turn the water supply back on and test the faucet. If the leak is gone, congrats! You’ve just saved yourself a plumber’s fee. If it’s still leaking, don’t panic. It might just need a little tweaking or another part replacement.
Common Mistakes to Avoid
Even the best of us make mistakes, but these are some common ones to watch out for when fixing a leaky tub faucet:
- Not turning off the water supply completely
- Over-tightening the parts, which can cause damage
- Using the wrong replacement parts
- Skipping the cleaning step, which can lead to continued leaks
Remember, patience is key. Take your time and double-check everything before you reassemble the faucet.
When to Call a Professional
Not every faucet issue can be fixed by a DIY enthusiast. If you’ve tried everything and the leak persists, it might be time to call in the pros. Here are some signs that it’s time to seek professional help:
- The faucet is severely corroded or damaged
- You’re dealing with a complex faucet type, like a cartridge or ceramic disc faucet
- You don’t have the right tools or experience
- The leak is causing water damage or mold
Don’t feel bad about calling a plumber—it’s better to get it done right than risk further damage.
Cost Breakdown: How Much Does It Cost to Fix a Leaky Tub Faucet?
Let’s talk numbers, shall we? Fixing a leaky tub faucet yourself can save you a ton of money. Here’s a rough estimate of the costs involved:
- Replacement parts: $5-$20
- Tools: $20-$50 (if you don’t already have them)
- Professional plumber: $100-$300 (depending on the job and location)
See the difference? DIY-ing it can be a huge money saver, especially if you’ve got the right skills and tools.
Environmental Impact: Why Fixing a Leak Matters
Did you know that a single leaking faucet can waste up to 3,000 gallons of water per year? That’s a lot of wasted resources, not to mention the impact on your wallet. By fixing that leak, you’re not only saving money but also doing your part to conserve water and protect the environment. So, it’s a win-win situation, right?
Final Tips and Tricks
Here are a few final tips to keep your tub faucet in tip-top shape:
- Regularly check for leaks and signs of wear
- Use a descaling solution every few months to prevent mineral buildup
- Replace worn-out parts as soon as you notice them
- Consider upgrading to a more efficient faucet if yours is outdated
These small steps can make a big difference in the long run. Plus, they’ll save you from having to deal with another leaky faucet anytime soon.
Conclusion: Take Action Today!
So there you have it, folks. Fixing a leaky tub faucet isn’t as daunting as it seems. With the right tools, a little patience, and this guide, you can tackle the job yourself and save some serious cash. Remember, even the smallest leaks can add up over time, so don’t ignore them.
Now, here’s the call to action: If you’ve been putting off fixing that leak, do it today. Share this guide with a friend who might need it, and leave a comment below if you’ve got any questions or tips of your own. Together, we can keep those drips at bay and save both water and money.
Thanks for reading, and happy DIY-ing!
Table of Contents
- Understanding the Problem: What Causes a Leaky Tub Faucet?
- Tools and Materials You’ll Need
- Step-by-Step Guide: How to Fix a Leaky Tub Faucet
- Common Mistakes to Avoid
- When to Call a Professional
- Cost Breakdown: How Much Does It Cost to Fix a Leaky Tub Faucet?
- Environmental Impact: Why Fixing a Leak Matters
- Final Tips and Tricks
- Conclusion: Take Action Today!