Leaky toilets can be more than just an annoying drip; they're a waste of water, money, and sanity. Imagine hearing that constant dripping sound all night long—it’s enough to drive anyone crazy. But don’t worry, fixing a leaky toilet isn’t rocket science. With the right tools, a bit of patience, and this step-by-step guide, you’ll have your toilet running smoothly in no time.
Fixing a leaky toilet is one of those home repairs that might seem intimidating at first, but trust me, it’s totally doable. Whether you’re dealing with a running toilet, water pooling around the base, or even a toilet that won’t stop refilling, we’ve got you covered. This guide will walk you through everything you need to know to get the job done right.
Before we dive into the nitty-gritty, let’s set the stage. A leaky toilet doesn’t just waste water—it can lead to bigger problems like water damage, mold growth, and higher utility bills. So, buckle up because we’re about to show you how to fix a leaky toilet like a pro!
Read also:Megan Thee Stallion Sex Tape Leak The Truth Behind The Hype
Why Is My Toilet Leaking? Understanding the Problem
Before you can fix a leaky toilet, it’s important to understand why it’s leaking in the first place. A toilet leak can happen for a variety of reasons, and identifying the source of the problem is key to fixing it. Let’s break it down:
Common Causes of Toilet Leaks
- Worn-out flapper valve
- Loose or damaged fill valve
- Cracked wax seal
- Broken tank bolts
- Loose supply line connections
Each of these issues can cause water to leak from your toilet, and they require different solutions. By pinpointing the exact cause of the leak, you’ll save yourself time, money, and frustration.
How to Diagnose a Leak: Step-by-Step Guide
Now that you know what could be causing your toilet to leak, it’s time to diagnose the problem. Here’s a simple step-by-step process to help you figure out where the leak is coming from:
Step 1: Check the Toilet Tank
The toilet tank is the most common culprit when it comes to leaks. A faulty flapper valve or fill valve can cause water to continuously run, leading to wasted water and higher bills. To check if your tank is leaking, follow these steps:
- Add a few drops of food coloring to the water in the tank.
- Wait for about 30 minutes without flushing the toilet.
- If the water in the bowl turns the same color as the food coloring, you’ve got a leaky flapper valve.
Step 2: Inspect the Base of the Toilet
Water pooling around the base of the toilet is another common issue. This could be due to a cracked wax seal or loose bolts. Here’s how to check:
- Look for signs of water damage around the base of the toilet.
- Feel the floor around the toilet for wetness or soft spots.
- Rock the toilet gently to see if it wobbles—if it does, the wax seal might need replacement.
Gathering the Right Tools and Materials
Fixing a leaky toilet requires the right tools and materials. Don’t worry—you don’t need to be a plumber to get the job done. Here’s a list of what you’ll need:
Read also:Mamaplugs Onlyfans Leaked The Untold Story Behind The Scenes
Tools You’ll Need
- Adjustable wrench
- Screwdriver
- Plunger
- Rubber gloves
- Bucket
Materials You Might Need
- Replacement flapper valve
- New fill valve
- Wax ring
- Teflon tape
Having these tools and materials on hand will make the repair process much smoother. Plus, you’ll feel like a DIY superhero!
How to Fix a Running Toilet: Flapper Valve Replacement
A running toilet is one of the most common issues homeowners face. The good news is that replacing the flapper valve is a quick and easy fix. Here’s how to do it:
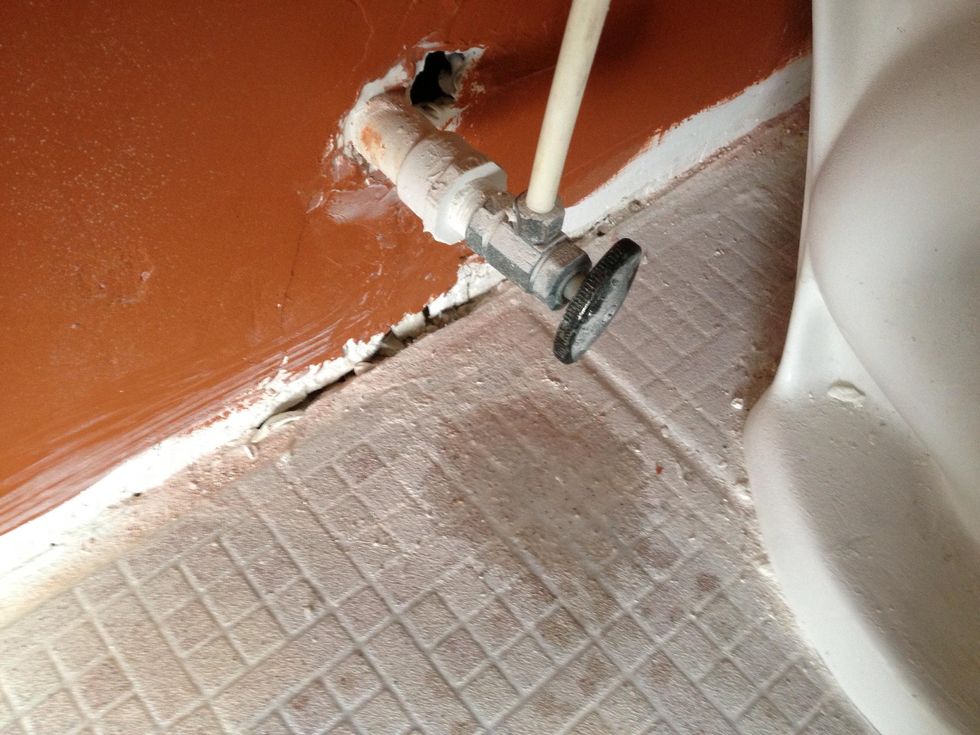
Step 1: Turn Off the Water Supply
Before you start, make sure to turn off the water supply to the toilet. You’ll find the shut-off valve behind the toilet, usually near the wall. Turn it clockwise to shut off the water.
Step 2: Flush the Toilet
Flush the toilet to drain the water from the tank. Use a cup or sponge to remove any remaining water from the tank.
Step 3: Replace the Flapper Valve
- Disconnect the old flapper valve by unhooking it from the chain and removing it from the overflow tube.
- Take the old flapper to the hardware store to find a matching replacement.
- Install the new flapper by hooking it onto the overflow tube and reconnecting the chain.
Fixing a Leaky Fill Valve
A leaky fill valve can also cause water to continuously run in your toilet. If you’ve already replaced the flapper valve and the problem persists, it might be time to replace the fill valve. Here’s how:
Step 1: Turn Off the Water Supply
Just like before, make sure to turn off the water supply to the toilet.
Step 2: Drain the Tank
Flush the toilet to drain the water from the tank. Use a cup or sponge to remove any remaining water.
Step 3: Remove the Old Fill Valve
- Disconnect the water supply line from the bottom of the fill valve.
- Unscrew the fill valve from the bottom of the tank.
- Lift the old fill valve out of the tank.
Step 4: Install the New Fill Valve
- Insert the new fill valve into the hole at the bottom of the tank.
- Screw it in place and connect the water supply line.
- Turn the water supply back on and adjust the water level as needed.
Replacing a Cracked Wax Seal
If water is pooling around the base of your toilet, it might be time to replace the wax seal. This is a bit more involved than replacing a flapper valve or fill valve, but it’s still doable. Here’s how:
Step 1: Turn Off the Water Supply
Turn off the water supply to the toilet and flush it to drain the tank.
Step 2: Disconnect the Water Supply Line
Use a wrench to disconnect the water supply line from the bottom of the toilet.
Step 3: Remove the Toilet
- Unscrew the bolts holding the toilet to the floor.
- Lift the toilet straight up and place it on a towel or cardboard to protect the surface.
Step 4: Replace the Wax Seal
- Remove the old wax seal from the flange.
- Place the new wax seal on the flange, making sure it’s centered.
Step 5: Reinstall the Toilet
- Lower the toilet back onto the wax seal, ensuring it’s aligned with the flange.
- Reattach the bolts and tighten them securely.
- Reconnect the water supply line and turn the water back on.
Tips for Preventing Future Leaks
Now that you’ve fixed your leaky toilet, it’s important to take steps to prevent future leaks. Here are a few tips to keep your toilet in top condition:
- Inspect your toilet regularly for signs of wear and tear.
- Replace the flapper valve every 3-5 years, even if it seems to be working fine.
- Check the water level in the tank to ensure it’s not too high or too low.
- Be mindful of what you flush down the toilet to avoid clogs.
When to Call a Professional
While many toilet leaks can be fixed with a bit of DIY know-how, there are times when it’s best to call in a professional. If you’ve tried all the steps above and the leak persists, or if you’re dealing with a more complex issue like a cracked toilet bowl, it might be time to bring in the experts.
Conclusion: Take Action and Save Water
Fixing a leaky toilet doesn’t have to be a daunting task. With the right tools, materials, and a bit of patience, you can save water, money, and peace of mind. Remember to diagnose the problem carefully, gather the necessary supplies, and follow the steps outlined in this guide. If you ever feel stuck, don’t hesitate to reach out for professional help.
Now that you’ve got the knowledge to fix a leaky toilet, why not share this guide with your friends and family? Spread the word about the importance of water conservation and help others tackle their own home repairs. Together, we can make a difference—one toilet at a time!
Table of Contents
- Why Is My Toilet Leaking? Understanding the Problem
- How to Diagnose a Leak: Step-by-Step Guide
- Gathering the Right Tools and Materials
- How to Fix a Running Toilet: Flapper Valve Replacement
- Fixing a Leaky Fill Valve
- Replacing a Cracked Wax Seal
- Tips for Preventing Future Leaks
- When to Call a Professional
- Conclusion: Take Action and Save Water