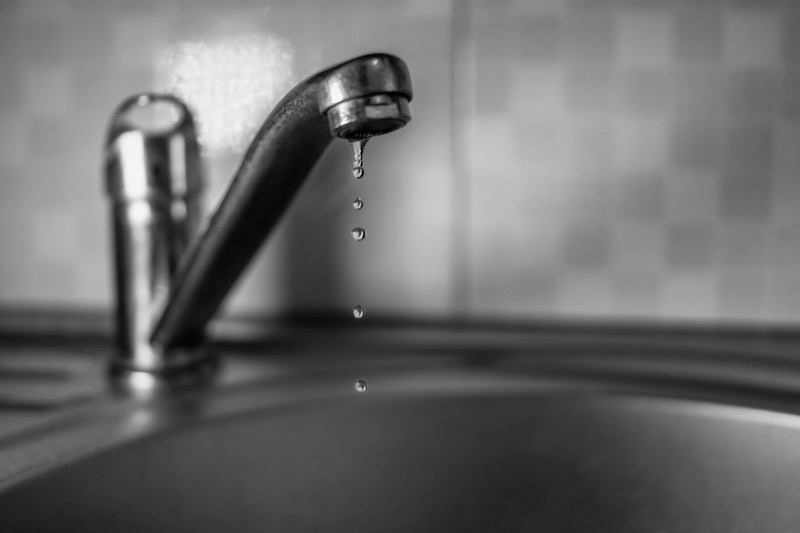
Hey there, neighbor! You’ve probably woken up to that annoying drip-drip-drip sound coming from your faucet, right? It’s like the universe is conspiring against you, keeping you up at night with that steady rhythm of water waste. But guess what? Fixing a leaking faucet isn’t as complicated as it sounds. In fact, with the right tools and a bit of patience, you can save yourself hundreds of bucks by tackling this job yourself. So, grab a coffee, sit tight, and let’s dive into how you can fix that pesky faucet in no time.
Let’s face it, a dripping faucet isn’t just annoying; it’s also costing you money. According to the EPA, a single leaking faucet can waste up to 3,000 gallons of water per year. That’s a lot of water—and cash—going down the drain. The good news? Most faucet leaks are caused by simple issues that even a beginner DIYer can fix. Whether it’s a worn-out washer, a loose connection, or a corroded valve seat, we’ve got you covered.
By the end of this guide, you’ll not only know how to fix a leaking faucet but also how to prevent future leaks. We’ll walk you through step-by-step instructions, provide handy tips, and even share some tricks that plumbers don’t want you to know. So, ready to roll up your sleeves and save the day? Let’s get started!
Read also:Why A Gas Leak Detector Is Your Homes Best Friend In 2023
Table of Contents
- Tools You Need to Fix a Leaking Faucet
- Common Causes of Faucet Leaks
- Step-by-Step Guide to Fix a Leaking Faucet
- How to Diagnose the Problem
- Replacing the Faucet Washer
- Sealing Loose Connections
- Preventive Measures to Avoid Future Leaks
- Cost-Saving Tips for Fixing Faucets
- When to Call a Plumber
- Frequently Asked Questions About Leaky Faucets
Tools You Need to Fix a Leaking Faucet
Before we jump into the nitty-gritty of fixing your faucet, let’s talk about the tools you’ll need. You don’t have to be a professional plumber to fix a leak, but having the right gear makes all the difference. Here’s a quick list of essentials:
- Adjustable wrench or pliers
- Screwdriver (Phillips or flathead, depending on your faucet)
- Faucet repair kit (includes washers, O-rings, and gaskets)
- Teflon tape (also known as plumber’s tape)
- Allen wrench (for cartridge faucets)
- Gloves (to keep your hands clean)
- Towel or cloth (for wiping up water)
Pro tip: If you’re unsure about what type of faucet you have, take a quick look under the sink or check the manufacturer’s label. This will help you grab the right replacement parts when you head to the hardware store.
Common Causes of Faucet Leaks
Understanding the root cause of your faucet leak is half the battle. Here are some of the most common culprits behind those pesky drips:
Worn-Out Washers
One of the most frequent reasons for faucet leaks is a worn-out washer. Over time, the constant friction between the washer and the valve seat can cause the washer to deteriorate. When this happens, water can seep through, leading to that dreaded drip. Replacing the washer is usually a quick fix.
Corroded Valve Seat
The valve seat is the part of the faucet where the washer sits. If it becomes corroded or damaged, water can leak around it. In this case, you’ll need to replace or refurbish the valve seat.
Loose Connections
Another common issue is loose connections. Whether it’s the connection between the faucet and the pipe or the handle and the stem, any loose fitting can lead to leaks. Tightening these connections with a wrench or pliers is often all it takes to stop the drip.
Read also:Lily Kawaii Leaks The Untold Story Behind The Viral Sensation
O-Ring Damage
Cartridge faucets often have an O-ring that can wear out over time. If the O-ring is damaged, water can leak from the handle. Replacing the O-ring is a simple and inexpensive fix.
Step-by-Step Guide to Fix a Leaking Faucet
Now that you know the common causes, let’s dive into the step-by-step process of fixing a leaking faucet. Follow these instructions carefully, and you’ll have your faucet back in working order in no time.
Step 1: Turn Off the Water Supply
Before you start tinkering with your faucet, make sure to turn off the water supply. Most sinks have a shut-off valve underneath. If you can’t find one, you’ll need to turn off the main water supply to your home. Trust me, you don’t want to deal with a surprise gush of water while working on your faucet.
Step 2: Remove the Faucet Handle
Use a screwdriver to remove the screw holding the handle in place. Some faucets have a decorative cap that hides the screw, so you might need to pry it off gently with a flathead screwdriver. Once the screw is out, pull the handle off to expose the stem.
Step 3: Inspect the Washer and O-Ring
Take a look at the washer and O-ring inside the stem. If they look worn out or damaged, replace them with new ones. Make sure to get the exact size and type to ensure a proper fit.
Step 4: Tighten Loose Connections
Check all the connections for any signs of looseness. Use a wrench or pliers to tighten them securely. Be careful not to overtighten, as this can cause damage to the fittings.
Step 5: Reassemble the Faucet
Once you’ve replaced any worn-out parts and tightened the connections, reassemble the faucet. Put the handle back on, screw it in place, and turn the water supply back on. Test the faucet to make sure the leak is gone.
How to Diagnose the Problem
Not all leaks are created equal. Sometimes, figuring out the exact issue can be a bit tricky. Here are a few tips to help you diagnose the problem:
- Listen for the sound of water running when the faucet is off. This could indicate a problem with the internal components.
- Check for visible signs of damage, such as corrosion or mineral buildup, around the base of the faucet.
- Run the faucet for a few minutes and observe where the water is leaking from. This can give you a clue about which part needs attention.
Remember, patience is key. Take your time to inspect each component thoroughly before jumping to conclusions.
Replacing the Faucet Washer
Replacing the washer is one of the easiest fixes for a leaking faucet. Here’s how you do it:
- Remove the handle and stem as described earlier.
- Pry out the old washer with a small screwdriver.
- Take the old washer to the hardware store to get an exact match.
- Insert the new washer into place and press it firmly.
- Reassemble the faucet and test it for leaks.
Voilà! That’s all there is to it. Most washers cost less than a dollar, so this is a super affordable fix.
Sealing Loose Connections
If the issue is loose connections, sealing them is a quick and easy solution. Here’s what you need to do:
- Turn off the water supply and disconnect the leaking pipe.
- Wrap Teflon tape around the threads of the pipe in a clockwise direction.
- Reconnect the pipe and tighten it securely with a wrench.
- Turn the water supply back on and check for leaks.
Teflon tape creates a watertight seal, preventing water from seeping through the connection. It’s a plumber’s best friend and should be in every homeowner’s toolkit.
Preventive Measures to Avoid Future Leaks
Fixing a leak is great, but preventing one is even better. Here are some tips to keep your faucets in top shape:
- Regularly check your faucets for signs of wear and tear. Replace washers and O-rings every few years, even if they’re not leaking yet.
- Use filtered water to reduce mineral buildup, which can damage internal components.
- Be gentle when turning the faucet on and off. Slamming the handle can cause premature wear.
- Inspect the water supply lines periodically for cracks or corrosion.
A little maintenance goes a long way in extending the life of your faucets.
Cost-Saving Tips for Fixing Faucets
Fixing a leaking faucet yourself can save you a ton of money. Here are some additional tips to stretch your budget:
- Buy replacement parts in bulk if you have multiple faucets in your home.
- Shop during sales or clearance events at your local hardware store.
- Learn basic plumbing skills to tackle other small repairs around the house.
By taking care of minor issues yourself, you’ll avoid costly plumber bills and keep more cash in your pocket.
When to Call a Plumber
While most faucet leaks are DIY-friendly, there are times when it’s best to call in the pros. If you’ve tried everything and the leak persists, or if the faucet is beyond repair, it’s time to bring in a plumber. They have the expertise and tools to handle more complex issues and can ensure the job is done right the first time.
Frequently Asked Questions About Leaky Faucets
Q: How much water does a leaking faucet waste?
A: A single dripping faucet can waste up to 3,000 gallons of water per year, according to the EPA. That’s a significant amount of water and money wasted.
Q: Can I fix a leaking faucet myself?
A: Absolutely! Most faucet leaks are caused by simple issues that can be fixed with basic tools and a bit of patience. Follow the steps in this guide, and you’ll be good to go.
Q: How often should I replace the washer in my faucet?
A: It’s a good idea to replace the washer every 2-3 years, even if it’s not leaking yet. This prevents unexpected leaks and extends the life of your faucet.
Q: What’s the best way to prevent faucet leaks?
A: Regular maintenance is key. Check your faucets periodically for signs of wear and tear, and replace worn-out parts before they cause a leak.
Conclusion
Fixing a leaking faucet might seem intimidating at first, but with the right tools and a bit of know-how, it’s a task that almost anyone can tackle. Not only will you save money by avoiding plumber bills, but you’ll also be doing your part to conserve water. Remember, a little DIY effort can go a long way in keeping your home running smoothly.
So, what are you waiting for? Grab your tools, follow the steps in this guide, and say goodbye to that annoying drip once and for all. And hey, if you found this article helpful, don’t forget to share it with your friends and family. Together, we can all become faucet-fixing pros!