Let’s face it, folks, there’s nothing more annoying than the constant dripping of a leaky faucet. You know that sound – it’s like your faucet is having a bad day and decided to let you know about it. Whether it’s a small drip or a full-on stream, a leaky faucet can waste gallons of water, increase your utility bills, and drive you absolutely nuts. But here’s the good news: fixing a leaky faucet isn’t as hard as you think. In this guide, we’ll break down exactly how you can stop a leaky faucet and save yourself from the headache.
Now, before you panic and call a plumber (which is totally fine if you want to), let’s dive into some basics. A leaky faucet is usually caused by worn-out parts, improper installation, or general wear and tear over time. The good news is that most faucet leaks are fixable with a little bit of know-how and some basic tools. So, if you’re ready to take control of your home plumbing situation, keep reading.
By the end of this article, you’ll have all the knowledge you need to stop a leaky faucet in its tracks. We’ll cover everything from diagnosing the problem to performing repairs, and even give you tips on how to prevent leaks in the future. So, grab your wrench, and let’s get started!
Read also:Gia Duddy Video Leak The Untold Story Behind The Controversy And The Truth You Need To Know
Table of Contents
- Understanding the Problem: What Causes a Leaky Faucet?
- Diagnosing the Leak: Identifying the Source of the Problem
- Tools and Materials You’ll Need to Stop a Leaky Faucet
- How Do You Stop a Leaky Faucet? Step-by-Step Guide
- Different Types of Faucets and How to Fix Them
- Preventing Future Leaks: Tips for Long-Term Maintenance
- The Cost of Fixing a Leaky Faucet
- How Much Water Does a Leaky Faucet Waste?
- When to Call a Professional Plumber
- Conclusion: Take Control of Your Home Plumbing
Understanding the Problem: What Causes a Leaky Faucet?
Common Causes of a Leak
Alright, so you’ve got a leaky faucet, but what’s really causing it? Here are some of the most common culprits:
- Worn-out washers: Over time, the rubber or plastic washers inside your faucet can degrade, leading to leaks.
- Corroded valve seats: If your faucet has been around for a while, the valve seat might have corroded, causing water to leak around the spout.
- Loose parts: Sometimes, the problem is as simple as a loose screw or connection. Tightening these parts can often solve the issue.
- Mineral buildup: Hard water can cause mineral deposits to form inside your faucet, leading to leaks or reduced water flow.
These are just a few examples, but understanding the root cause is key to fixing the problem. Now, let’s move on to diagnosing the leak.
Diagnosing the Leak: Identifying the Source of the Problem
Where Is the Leak Coming From?
Before you start tearing apart your faucet, it’s important to figure out exactly where the leak is coming from. Here’s how you can do that:
- Turn off the water supply: Locate the shutoff valves under the sink and turn them off to prevent water from flowing while you inspect.
- Inspect the faucet: Check the spout, handle, and base of the faucet for visible signs of water dripping or pooling.
- Test the handles: Turn the handles on and off to see if the leak persists. This can help you determine if the issue is with the handle or another part of the faucet.
Once you’ve identified the source of the leak, you’re ready to move on to the next step.
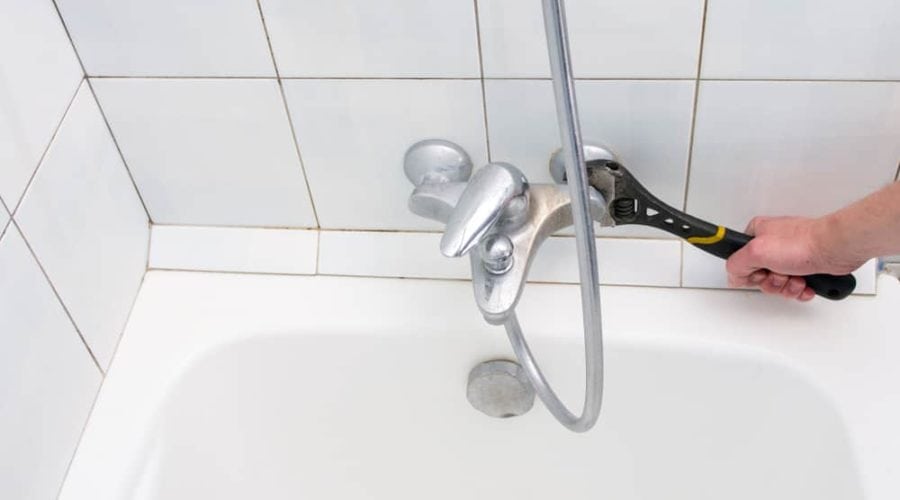
Tools and Materials You’ll Need to Stop a Leaky Faucet
Fixing a leaky faucet doesn’t require a ton of fancy equipment, but there are a few essential tools and materials you’ll want to have on hand:
- Wrench (adjustable or socket)
- Phillips and flathead screwdrivers
- Pliers
- Replacement washers, O-rings, or cartridges
- Teflon tape
- Bucket or towel (to catch water)
Having these tools ready will make the repair process much smoother. Now, let’s dive into the step-by-step guide.
Read also:Megan Thee Stallion Leak The Untold Story Behind The Scenes
How Do You Stop a Leaky Faucet? Step-by-Step Guide
Alright, here’s where the magic happens. Follow these steps to stop your leaky faucet once and for all:
- Turn off the water supply: As we mentioned earlier, locate the shutoff valves under the sink and turn them off. This will prevent water from flowing while you work.
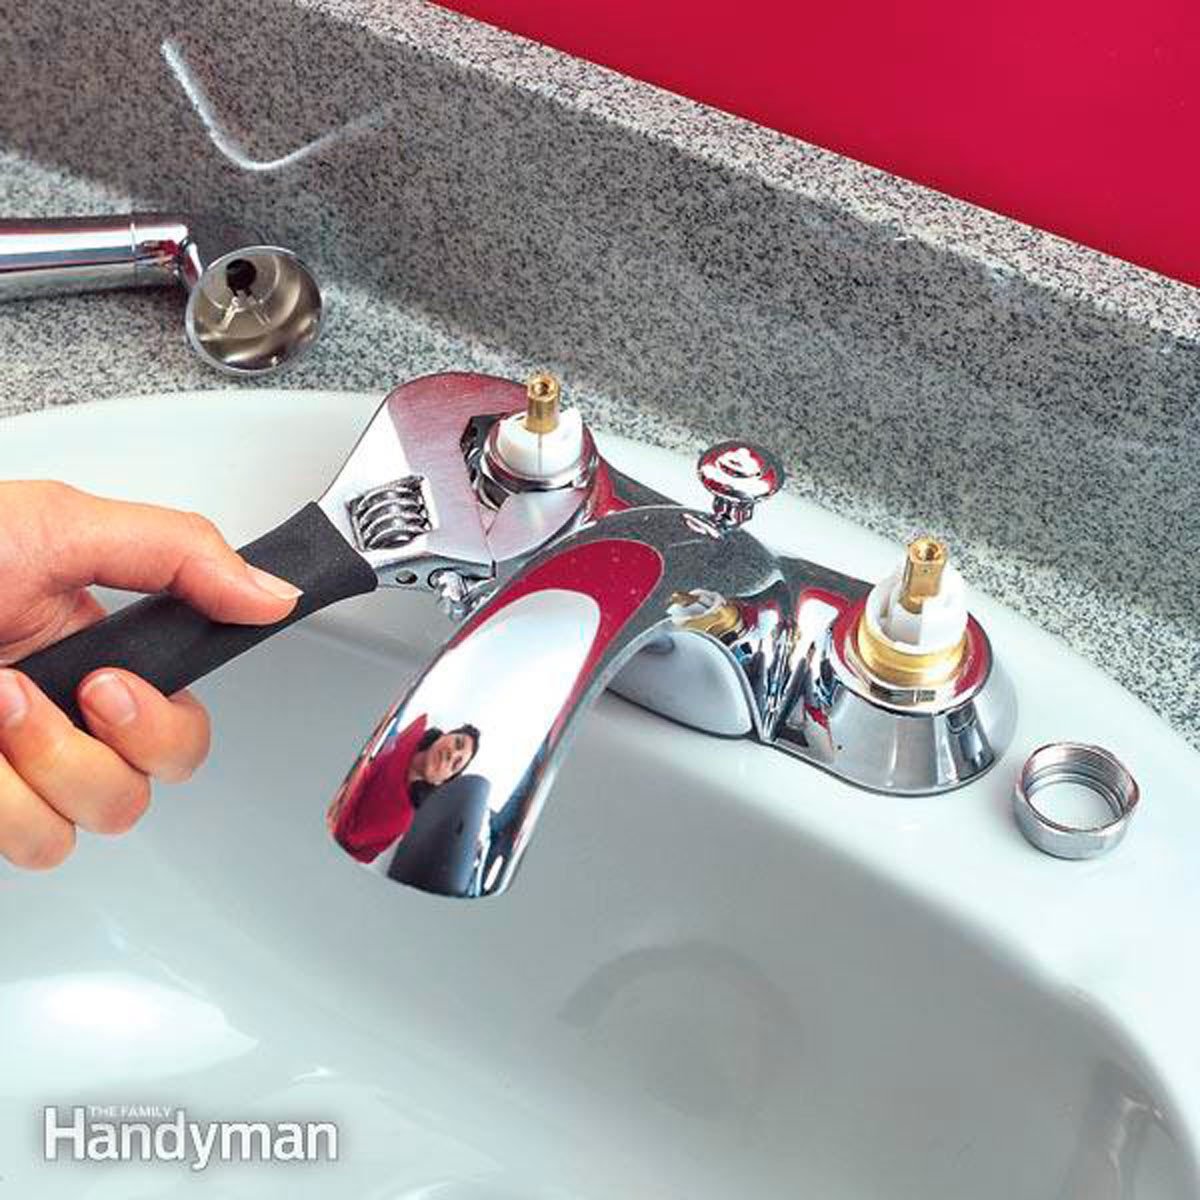
- Remove the handle: Use a screwdriver or Allen wrench to remove the handle of the faucet. Some handles may have a decorative cap that hides the screw – gently pry it off with a flathead screwdriver.
- Inspect the washer: Once the handle is off, you’ll see the washer or O-ring inside. Check for signs of wear or damage. If it’s worn out, replace it with a new one that matches the size and type.
- Check the valve seat: If the washer isn’t the problem, inspect the valve seat for corrosion. You can clean it with a valve seat wrench or replace it if necessary.
- Reassemble the faucet: Once you’ve made the necessary repairs, reassemble the faucet in reverse order. Make sure everything is tightened securely.
- Test the faucet: Turn the water supply back on and test the faucet to ensure the leak is gone.
That’s it! With these steps, you should be able to stop most leaks. But what about different types of faucets? Let’s explore that next.
Different Types of Faucets and How to Fix Them
Ball Faucets
Ball faucets are common in kitchens and bathrooms. They use a single handle that moves over a ball mechanism to control water flow. If you have a ball faucet, here’s how to fix it:
- Remove the handle and cap to access the ball mechanism.
- Check for worn-out cam washers and replace them if necessary.
- Reassemble the faucet and test for leaks.
Cartridge Faucets
Cartridge faucets use a cartridge instead of a washer to control water flow. If your cartridge faucet is leaking, you may need to replace the cartridge:
- Remove the handle and unscrew the cartridge.
- Take the old cartridge to a hardware store to find an exact match.
- Install the new cartridge and test the faucet.
Each type of faucet has its own quirks, but with the right tools and knowledge, you can fix them all.
Preventing Future Leaks: Tips for Long-Term Maintenance
Prevention is key when it comes to avoiding future leaks. Here are some tips to keep your faucets in good condition:
- Regularly clean your faucets to prevent mineral buildup.
- Check for loose connections and tighten them as needed.
- Replace worn-out parts before they cause a leak.
- Install a water softener if you have hard water to reduce mineral deposits.
By taking these steps, you can extend the life of your faucets and avoid costly repairs down the line.
The Cost of Fixing a Leaky Faucet
Fixing a leaky faucet can save you money in the long run. Here’s a breakdown of the costs involved:
- DIY repair: $5-$20 for replacement parts.
- Hiring a plumber: $75-$150 per hour, depending on the complexity of the repair.
As you can see, doing it yourself is not only rewarding but also cost-effective.
How Much Water Does a Leaky Faucet Waste?
Did you know that a single dripping faucet can waste up to 3,000 gallons of water per year? That’s a lot of wasted resources and money. By fixing your leaky faucet, you’re not only saving water but also helping the environment.
When to Call a Professional Plumber
While most leaks can be fixed by a DIY enthusiast, there are times when it’s best to call in a professional. If you’re dealing with:
- Severe leaks that can’t be fixed with basic repairs.
- Old or outdated plumbing systems.
- Complex issues that require specialized tools or knowledge.
Don’t hesitate to reach out to a licensed plumber. They can provide expert advice and ensure the job is done right.
Conclusion: Take Control of Your Home Plumbing
So, there you have it – a comprehensive guide on how to stop a leaky faucet. By understanding the causes, diagnosing the problem, and following the right steps, you can fix most leaks yourself. Not only will this save you money, but it’ll also give you a sense of accomplishment.
Remember, prevention is key. Regular maintenance and inspections can help you avoid leaks in the future. And if all else fails, don’t hesitate to call in a professional.
Now, it’s your turn. Have you ever fixed a leaky faucet? Share your experience in the comments below, and don’t forget to check out our other articles for more home improvement tips. Happy plumbing, folks!