So, you’ve finally reached that point where ignoring the dripping sound coming from your faucet just isn’t cutting it anymore. That annoying *drip… drip… drip* isn’t just driving you crazy—it’s also costing you money in wasted water and potentially damaging your plumbing system. Let’s face it, fixing a leaky faucet isn’t exactly rocket science, but it can feel overwhelming if you’ve never tackled it before. But don’t sweat it, my friend. You’re about to learn how to fix a leaky faucet like a pro, and trust me, this is one skill that’ll save you tons of cash in the long run. So grab your tools, roll up those sleeves, and let’s get started.
Fixing a leaky faucet doesn’t have to be a daunting task. In fact, with the right tools and a bit of know-how, it’s something most people can do themselves without calling in the plumber. And hey, who doesn’t love saving money while also gaining some DIY credibility? By the end of this guide, you’ll not only know how to stop that relentless drip but also understand the underlying causes and how to prevent future leaks.
Now, before we dive headfirst into the nitty-gritty, let’s talk about why fixing a leaky faucet matters. Sure, it might seem like a minor issue, but did you know that a single dripping faucet can waste up to 3,000 gallons of water per year? That’s a lot of wasted H2O, and depending on your water bill, it could mean hundreds of dollars down the drain—literally. Plus, a persistent leak can lead to mold, mildew, and even structural damage if left unchecked. So yeah, fixing that faucet isn’t just about silencing the annoying noise—it’s about protecting your home and wallet.
Read also:Lindsay Capuano Leak The Untold Story Behind The Scandal
Why Does My Faucet Leak in the First Place?
Understanding the root cause of your leaky faucet is the first step toward fixing it. Most leaks are caused by worn-out parts, corrosion, or improper installation. Here’s a quick rundown of the most common culprits:
- Worn-Out Washers: Over time, the rubber or plastic washers inside your faucet can degrade, leading to leaks.
- Corroded Valves: If your faucet has been around for a while, the valve seats may have corroded, causing water to seep out.
- O-Rings: These tiny rubber rings seal the faucet stem, and when they wear out, water starts dripping.
- Loose Connections: Sometimes, the issue isn’t internal—it’s simply a loose connection between pipes or fittings.
- Mineral Buildup: Hard water can leave mineral deposits that interfere with the proper functioning of your faucet.
Now that you know what could be causing the problem, let’s move on to the fun part: fixing it!
Gather Your Tools and Materials
Before you start tinkering with your faucet, make sure you have the right tools and materials on hand. Nothing’s worse than being halfway through a repair job only to realize you’re missing something crucial. Here’s what you’ll need:
- Adjustable wrench
- Phillips and flathead screwdrivers
- Pliers
- Replacement parts (washers, O-rings, or cartridges)
- Silicone grease
- Vinegar or descaling solution (if dealing with mineral buildup)
- Towel or cloth
- Bucket (to catch water)
Pro Tip: It’s always a good idea to bring the old parts to the hardware store so you can match them exactly when buying replacements. This ensures a perfect fit and minimizes the risk of buying the wrong thing.
Step-by-Step Guide: How Do You Fix a Leaky Faucet?
Step 1: Turn Off the Water Supply
Before you start disassembling your faucet, turn off the water supply. Most sinks have shutoff valves underneath, but if yours doesn’t, you’ll need to turn off the main water supply to your house. Trust me, skipping this step can lead to a massive flood—and no one wants that.
Step 2: Plug the Drain
Use a sink plug or a rag to block the drain. This prevents any small parts from falling in and disappearing forever. Losing a crucial piece mid-repair is a rookie mistake you want to avoid.
Read also:Celebrity Nude Leaked The Dark Side Of Fame And Privacy Invasion
Step 3: Remove the Faucet Handle
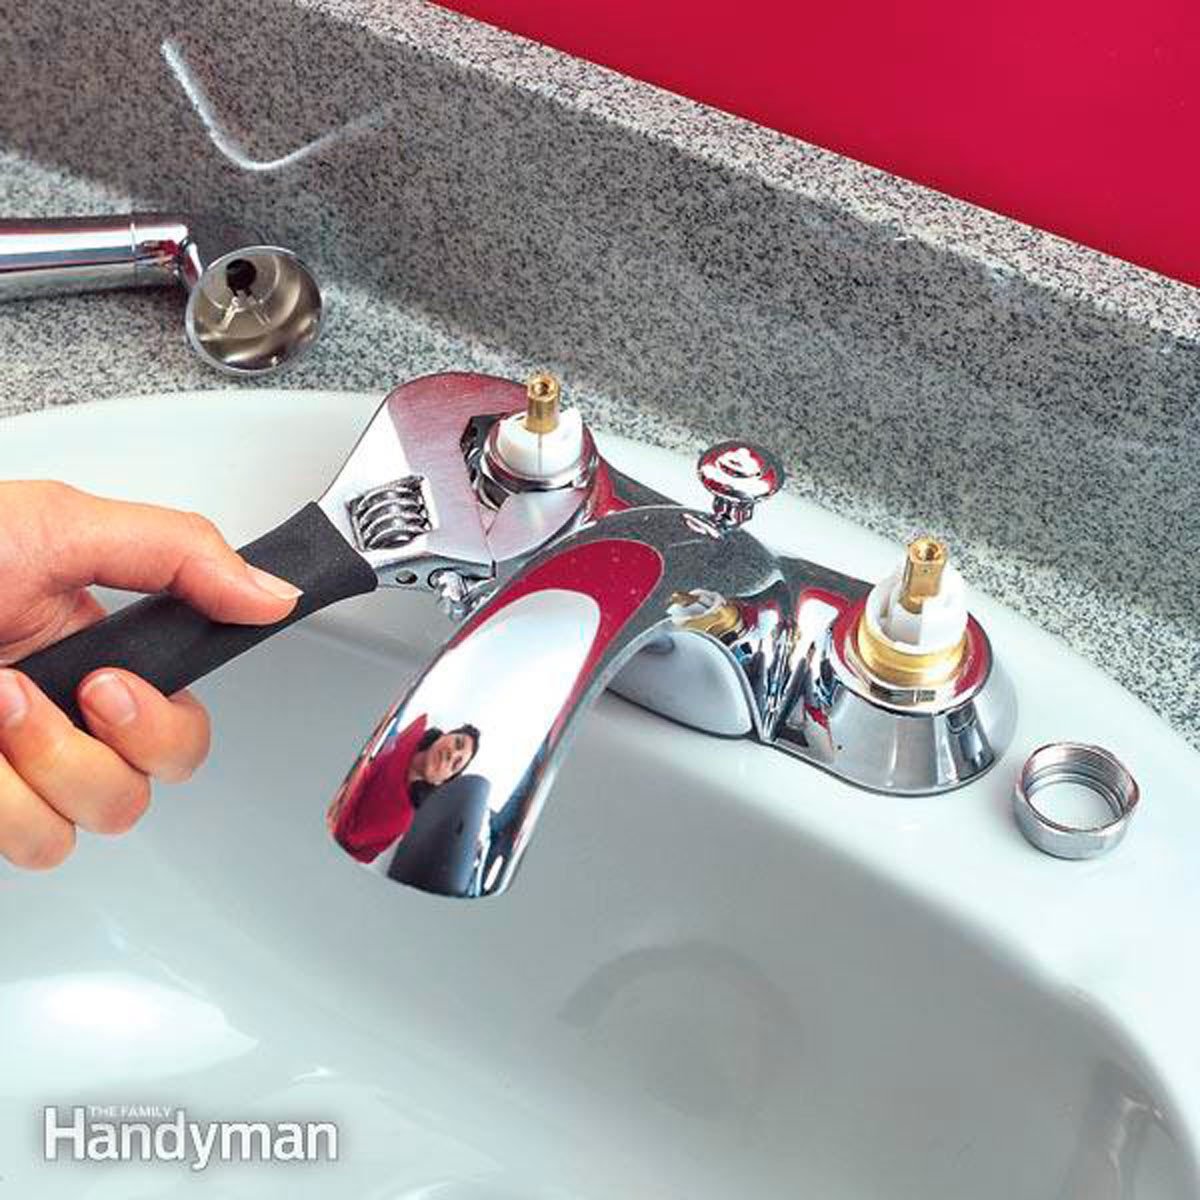
Depending on your faucet type, you might need to unscrew a decorative cap to access the handle screw. Use a screwdriver to remove the handle, then gently lift it off. Be careful not to scratch the faucet surface.
Step 4: Inspect and Replace Parts
Once the handle is off, inspect the inner workings of your faucet. Look for worn-out washers, corroded valve seats, or damaged O-rings. Replace any parts that show signs of wear and tear. If your faucet uses a cartridge instead of a washer, make sure to get an exact match for your model.
Step 5: Clean Mineral Deposits
If mineral buildup is the issue, soak the affected parts in white vinegar or a descaling solution. Let them sit for a few hours, then scrub gently with a toothbrush to remove stubborn deposits.
Step 6: Reassemble and Test
Once everything’s clean and replaced, reassemble the faucet in reverse order. Turn the water supply back on and test the faucet to ensure the leak is gone. If you still notice dripping, double-check your work and make any necessary adjustments.
Types of Faucets and Their Unique Fixes
Not all faucets are created equal, and different types may require slightly different approaches. Let’s break it down:
Compression Faucets
These are the classic faucets with separate hot and cold handles. Leaks are usually caused by worn-out washers or O-rings. Replacing these parts should do the trick.
Cartridge Faucets
Cartridge faucets are common in modern kitchens and bathrooms. If your cartridge is damaged, you’ll need to replace it with an exact match for your faucet model.
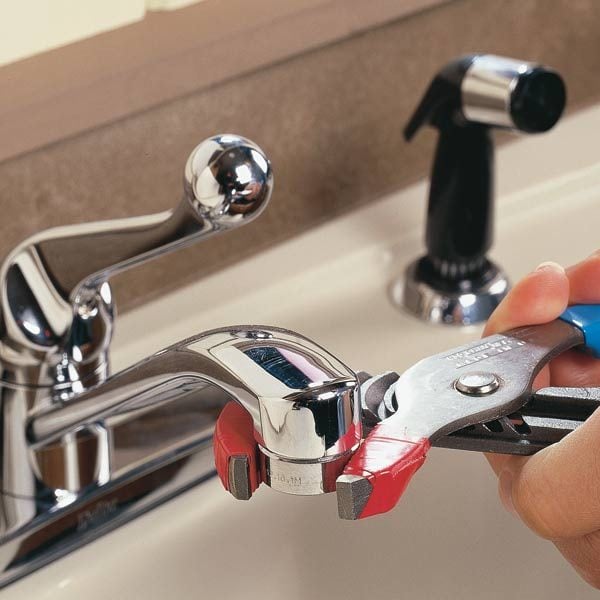
Ball Faucets
Ball faucets use a single lever to control water flow and temperature. Leaks are often due to worn-out rubber seals or springs. Replacing these components should fix the issue.
Ceramic Disk Faucets
These high-tech faucets are known for their durability, but when they leak, it’s usually because of a damaged ceramic disk. Unfortunately, repairing ceramic disks can be tricky, so you might need to replace the entire cartridge.
Tips for Preventing Future Leaks
Fixing a leaky faucet is one thing, but preventing future leaks is another. Here are a few tips to keep your faucets in top shape:
- Regularly check for signs of wear and tear, especially around washers and O-rings.
- Use descaling solutions periodically to remove mineral buildup.
- Avoid overtightening handles, as this can damage internal components.
- Consider upgrading to a higher-quality faucet if yours is prone to frequent leaks.
When to Call a Professional Plumber
While most faucet repairs are DIY-friendly, there are times when calling in a professional is the best option. If you’ve tried everything and the leak persists, or if you’re dealing with a complex issue like a corroded pipe, it might be time to bring in the experts. Remember, a licensed plumber has the expertise and tools to handle even the trickiest plumbing problems.
Cost of Fixing a Leaky Faucet
One of the best things about fixing a leaky faucet yourself is the cost savings. Replacement parts like washers and O-rings typically cost just a few bucks, while more complex repairs might run you $20–$50. Compare that to the $100–$200 you’d pay for a plumber, and it’s easy to see why DIY is the way to go.
Environmental Impact of a Leaky Faucet
Did you know that fixing a leaky faucet isn’t just good for your wallet—it’s also great for the planet? A single dripping faucet can waste thousands of gallons of water each year, contributing to water scarcity and environmental degradation. By addressing leaks promptly, you’re doing your part to conserve this precious resource.
Final Thoughts: How Do You Fix a Leaky Faucet?
There you have it—everything you need to know about fixing a leaky faucet. From understanding the causes to gathering the right tools and following a step-by-step guide, you’re now equipped to tackle this common household issue with confidence. Remember, fixing a leaky faucet isn’t just about stopping the noise—it’s about saving money, protecting your home, and doing your part for the environment.
So go ahead, take that first step toward becoming a DIY plumbing guru. And when you’re done, don’t forget to share your success story in the comments below. Who knows? You might just inspire someone else to give it a try. Happy wrenching!
Table of Contents
- Why Does My Faucet Leak in the First Place?
- Gather Your Tools and Materials
- Step-by-Step Guide: How Do You Fix a Leaky Faucet?
- Types of Faucets and Their Unique Fixes
- Tips for Preventing Future Leaks
- When to Call a Professional Plumber
- Cost of Fixing a Leaky Faucet
- Environmental Impact of a Leaky Faucet
- Final Thoughts: How Do You Fix a Leaky Faucet?