So, you’ve noticed that your bathtub faucet is leaking, and you’re wondering how do I repair a leaky bathtub faucet? Don’t stress, my friend. It’s more common than you think, and most of the time, it’s not as daunting as it seems. A dripping faucet might seem like a minor issue, but if left unchecked, it could waste gallons of water and even damage your bathroom. Let’s dive in and figure out what’s causing that pesky leak and how you can fix it yourself!
Whether you’re a seasoned DIY enthusiast or a complete newbie, repairing a leaky bathtub faucet is something you can tackle with the right tools and guidance. This guide will walk you through every step, from diagnosing the problem to completing the repair. Trust me, by the end of this, you’ll feel like a plumbing pro!
Before we get into the nitty-gritty, let’s address the elephant in the room: why should you care about a leaking faucet? Well, apart from the annoying dripping sound that keeps you up at night, it’s also a waste of water and money. Fixing it sooner rather than later can save you big bucks on your water bill and prevent further damage to your bathroom fixtures.
Read also:Lovenexy Onlyfans Leaks The Truth Behind The Hype
Understanding the Basics: What Causes a Leaky Bathtub Faucet?
When your bathtub faucet starts leaking, the first step is understanding the root cause. There are several reasons why faucets develop leaks, and identifying the issue will help you determine the best course of action. Here’s a quick rundown:
Common Reasons for a Leaky Faucet
Let’s break it down into bite-sized chunks so it’s easier to digest:
- Worn-out washers or O-rings: These tiny rubber components can degrade over time, leading to leaks.
- Corroded valve seats: The valve seat is the part where the faucet stem meets the spout. If it’s corroded, water can seep out.
- Loose parts: Sometimes, the problem is as simple as a loose screw or handle that needs tightening.
- Mineral buildup: Hard water can cause mineral deposits to accumulate, obstructing the flow and causing leaks.
- Cartridge or ceramic disk issues: In modern faucets, cartridges or ceramic disks control the water flow. If they’re damaged, leaks can occur.
Tools and Materials You’ll Need
Before you jump into the repair process, gather all the necessary tools and materials. Having everything on hand will save you time and frustration. Here’s what you’ll need:
Essential Tools
- Adjustable wrench
- Plumber’s wrench
- Screwdriver (Phillips or flathead, depending on your faucet)
- Allen wrench
- Replacement washers, O-rings, or cartridges (depending on your faucet type)
- Plumbing grease
- Vinegar or descaling solution (for mineral buildup)
Pro tip: If you’re not sure which replacement parts to buy, take the old ones with you to the hardware store. This will ensure you get the right fit.
Step-by-Step Guide: How Do I Repair a Leaky Bathtub Faucet?
Now that you’ve got your tools and materials ready, let’s get down to business. Follow these steps carefully, and you’ll have your faucet fixed in no time.
Step 1: Turn Off the Water Supply
This is a crucial step that many people overlook. Before you start tinkering with your faucet, make sure to turn off the water supply. Most bathtubs have shutoff valves underneath the tub or near the wall. If you can’t find them, turn off the main water supply to your home.
Read also:Tara Strong Leaked The Truth Behind The Controversy And What You Need To Know
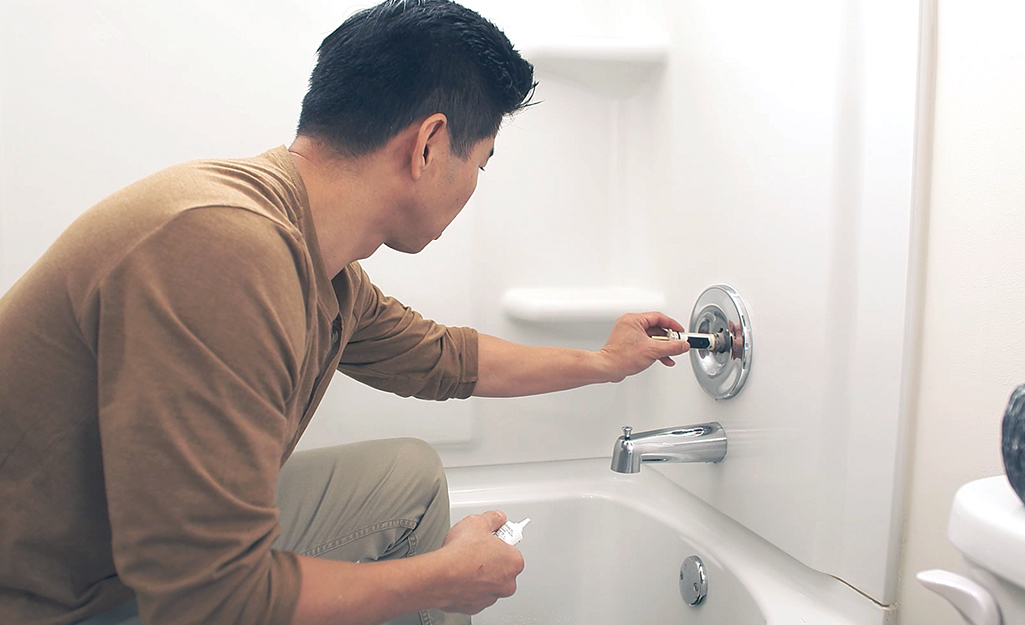
Step 2: Remove the Faucet Handle
Most faucet handles are held in place by a screw or a decorative cap. Use a screwdriver to remove the screw, and gently pull the handle off. If there’s a cap, pry it off with a flathead screwdriver to reveal the screw underneath.
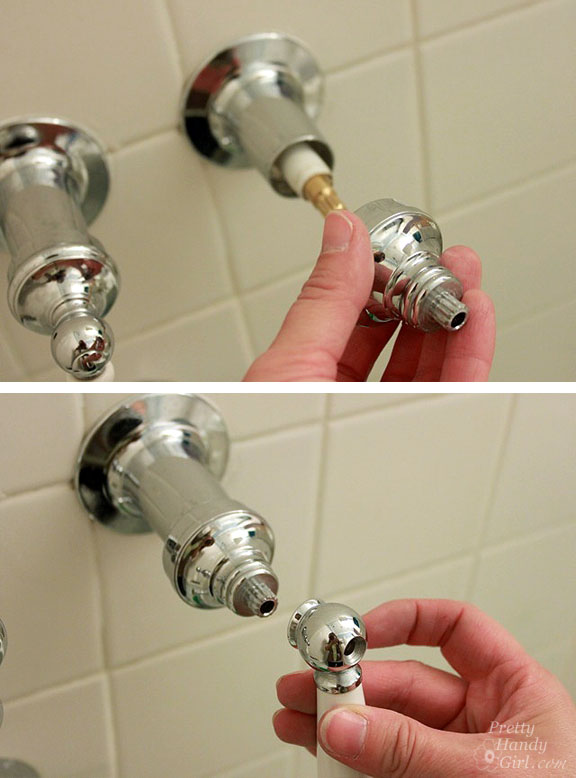
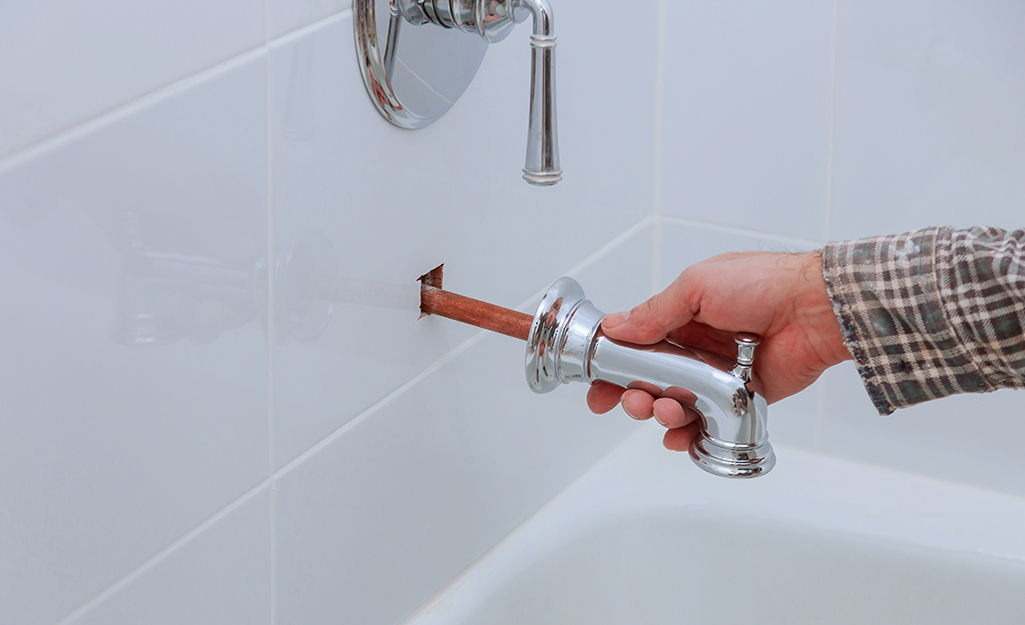
Step 3: Inspect the Stem and Washers
Once the handle is off, you’ll see the faucet stem. Check the washer at the end of the stem for signs of wear and tear. If it’s cracked or flattened, replace it with a new one. Don’t forget to apply a bit of plumbing grease to the new washer for smooth operation.
Step 4: Check the O-Rings
O-rings are small rubber rings that seal the faucet stem. If they’re worn out or brittle, replace them with new ones. Make sure the replacement O-rings match the size and material of the old ones.
Step 5: Clean the Valve Seat
If the valve seat is corroded, use a valve seat wrench to remove it and clean it with sandpaper or a descaling solution. Once it’s clean, reinsert it and tighten it securely.
Step 6: Replace the Cartridge or Ceramic Disk
For modern faucets with cartridges or ceramic disks, remove the old one and replace it with a new one. Make sure to follow the manufacturer’s instructions carefully to ensure proper installation.
Step 7: Reassemble the Faucet
Once all the parts are replaced or cleaned, reassemble the faucet in the reverse order you took it apart. Tighten everything securely but be careful not to overtighten, as this can cause damage.
Step 8: Test the Faucet
Turn the water supply back on and test the faucet. Check for leaks and ensure the water flows smoothly. If everything looks good, congrats—you’ve just repaired your leaky bathtub faucet!
Troubleshooting Common Issues
Even with the best intentions, things can sometimes go wrong. Here are some common issues you might encounter during the repair process and how to fix them:
Leak Persists After Repair
If the faucet is still leaking after you’ve replaced the washers and O-rings, it could be due to a deeper issue, such as a damaged valve seat or a faulty cartridge. Double-check all the parts and ensure they’re properly installed. If the problem persists, it might be time to call in a professional plumber.
Mineral Buildup Remains
Hard water can leave stubborn mineral deposits on your faucet, making it difficult to achieve a watertight seal. Soak the affected parts in a vinegar solution or use a commercial descaling product to dissolve the buildup. Scrub gently with a toothbrush to remove any remaining residue.
Faucet Handle Won’t Tighten
If the faucet handle feels loose no matter how tight you make it, the problem might be with the screw or the handle itself. Inspect the screw for signs of damage and replace it if necessary. If the handle is worn out, consider replacing it with a new one.
Cost Considerations: How Much Will It Cost to Fix?
One of the biggest concerns for homeowners is the cost of repairs. Fortunately, fixing a leaky bathtub faucet is usually an affordable DIY project. Here’s a breakdown of the potential costs:
Replacement Parts
Washers, O-rings, and cartridges are relatively inexpensive, with prices ranging from $2 to $20, depending on the brand and quality. If you need to replace the entire faucet, expect to spend anywhere from $50 to $200 for a mid-range option.
Hiring a Plumber
If you’re not comfortable doing the repair yourself, hiring a plumber is always an option. The cost will vary depending on your location and the complexity of the job, but you can expect to pay between $100 and $300 for a standard faucet repair.
Preventative Maintenance: How to Avoid Future Leaks
Prevention is always better than cure. Here are some tips to help you avoid future leaks and keep your bathtub faucet in top condition:
Regular Inspections
Make it a habit to inspect your faucet regularly for signs of wear and tear. Check the washers, O-rings, and other components at least once a year and replace them as needed.
Use Soft Water
Hard water can cause mineral buildup, leading to leaks and other issues. Consider installing a water softener to reduce the mineral content in your water supply.
Turn Off the Water Supply When Not in Use
If you’re going to be away from home for an extended period, turn off the water supply to your bathtub. This will reduce the risk of leaks and other plumbing issues.
DIY vs. Professional: Which Is Right for You?
Deciding whether to tackle the repair yourself or hire a professional depends on your skill level and comfort with plumbing tasks. If you’re confident in your abilities and have the right tools, DIY is a great option. However, if the job seems too complex or you’re short on time, don’t hesitate to call in a plumber.
Conclusion: You’ve Got This!
So there you have it—a comprehensive guide on how do I repair a leaky bathtub faucet. With the right tools, materials, and know-how, you can fix that annoying leak and save yourself some serious cash. Remember, prevention is key, so make sure to maintain your faucet regularly to avoid future issues.
Now that you’ve learned how to repair a leaky bathtub faucet, why not share your newfound knowledge with others? Leave a comment below and let us know how your repair went. And if you found this guide helpful, don’t forget to check out our other articles for more DIY tips and tricks!
Table of Contents
- Understanding the Basics: What Causes a Leaky Bathtub Faucet?
- Tools and Materials You’ll Need
- Step-by-Step Guide: How Do I Repair a Leaky Bathtub Faucet?
- Troubleshooting Common Issues
- Cost Considerations: How Much Will It Cost to Fix?
- Preventative Maintenance: How to Avoid Future Leaks
- DIY vs. Professional: Which Is Right for You?
- Conclusion: You’ve Got This!