Ever noticed that annoying drip from your bathtub faucet? Yeah, it’s one of those little things that can drive you nuts if you don’t fix it soon. A leaky bathtub faucet isn’t just an irritation; it’s also a potential money waster and a sign of bigger plumbing issues lurking beneath the surface. If left unchecked, that tiny drip could lead to bigger problems down the road, like water damage or mold growth. Let’s face it—no one wants to deal with that mess.
Now, before you panic and call in the pros, hear me out. Fixing a leaky bathtub faucet isn’t as hard as you think. With the right tools, a bit of patience, and this handy guide, you can tackle the job yourself and save some cash in the process. Plus, there’s something oddly satisfying about fixing things on your own, right?
In this article, we’ll break down everything you need to know about leaky bathtub faucets—from identifying the root cause to performing the repair step-by-step. Whether you’re a seasoned DIY enthusiast or a total newbie, this guide has got you covered. So grab a cup of coffee, sit back, and let’s dive into solving this plumbing puzzle together!
Read also:Liz Cambage Onlyfans Leaked The Inside Scoop You Need To Know
Table of Contents
- Understanding the Problem: What Causes a Leaky Bathtub Faucet?
- Gathering the Right Tools and Materials
- How to Diagnose the Leak
- Step-by-Step Guide to Repairing Your Leaky Bathtub Faucet
- Tips for Preventing Future Leaks
- Common Mistakes to Avoid
- Frequently Asked Questions About Leaky Bathtub Faucets
Understanding the Problem: What Causes a Leaky Bathtub Faucet?
Before we jump into solutions, it’s important to understand why your bathtub faucet is leaking in the first place. Believe it or not, there are several reasons behind that pesky drip. Here’s a quick rundown:
- Worn-out washers: Over time, the rubber washers inside your faucet can wear out, causing water to seep through.
- Corroded valve seats: If the valve seat—the part where the water flows out—is corroded, it can lead to leaks.
- Loose parts: Sometimes, all it takes is a simple tightening of the faucet handle or stem to stop the leak.
- O-ring damage: The O-ring is a small rubber ring that helps seal the faucet. If it gets damaged, water can escape.
- Mineral buildup: Hard water can cause mineral deposits to form around your faucet, leading to leaks.
Now that you know the possible culprits, it’s time to roll up your sleeves and get to work. But first, let’s talk about what you’ll need to fix the issue.
Gathering the Right Tools and Materials
Fixing a leaky bathtub faucet doesn’t require a ton of fancy equipment. Most of the tools you’ll need are probably already in your garage or toolbox. Here’s a list of essentials:
- Screwdriver (Phillips or flathead, depending on your faucet)
- Adjustable wrench
- Pliers
- Replacement washers or O-rings (check your faucet model for the right size)
- Plumber’s grease
- Vinegar or descaling solution (for mineral buildup)
Make sure you have all these tools on hand before starting the repair. Trust me, it’s better to be prepared than to realize halfway through that you’re missing something crucial.
How to Diagnose the Leak
Diagnosing the exact cause of your leaky bathtub faucet is half the battle. Here’s a step-by-step process to help you pinpoint the problem:
Read also:Cavinder Twins Leaked The Inside Story You Need To Know
Step 1: Check for Visible Damage
Start by inspecting the faucet for any visible signs of damage, like cracks or corrosion. Sometimes, the issue is as simple as a worn-out seal or a loose connection.
Step 2: Turn Off the Water Supply
Before you do anything else, make sure to turn off the water supply to your bathtub. This will prevent water from flowing while you work and save you a lot of hassle.
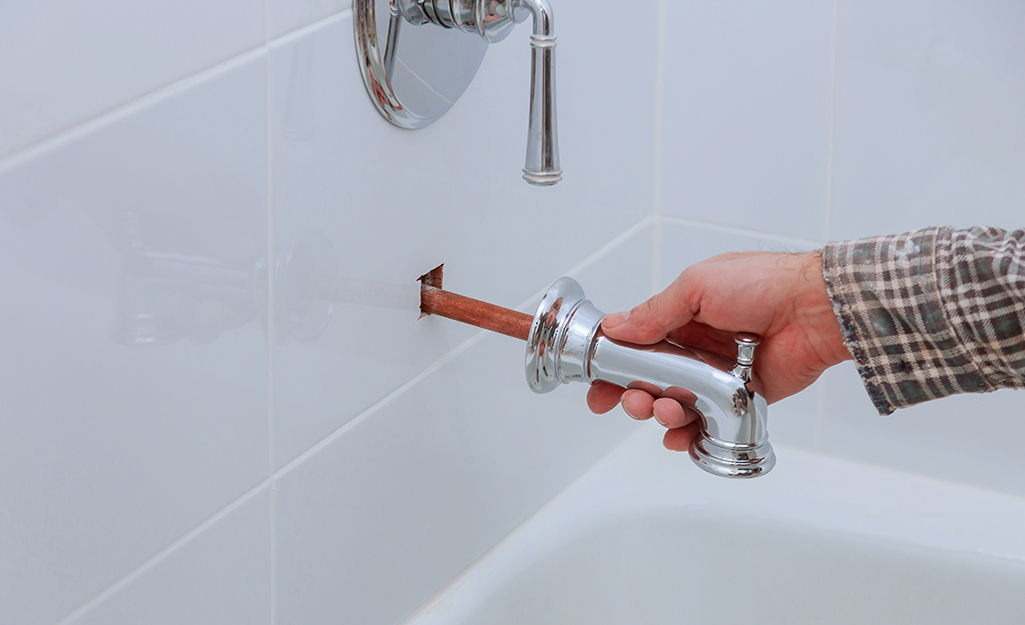
Step 3: Disassemble the Faucet
Using your screwdriver or wrench, carefully disassemble the faucet. Take note of how each part fits together so you can reassemble it later. Look for any worn-out washers, damaged O-rings, or corroded valve seats.
Remember, patience is key here. Don’t rush the process—you want to make sure you identify the exact cause of the leak before moving on to the repair phase.
Step-by-Step Guide to Repairing Your Leaky Bathtub Faucet
Now that you’ve diagnosed the problem, it’s time to fix it. Follow these steps carefully to ensure a successful repair:
Step 1: Replace Worn-Out Washers
If you noticed any worn-out washers during the diagnosis phase, replace them with new ones. Make sure to use the correct size for your faucet model.
Step 2: Clean Mineral Deposits
Mineral buildup can be a sneaky cause of leaks. Soak a cloth in vinegar or descaling solution and wrap it around the faucet for about 15-20 minutes. This should help dissolve any deposits and restore the faucet to its original condition.
Step 3: Lubricate Moving Parts
Apply a small amount of plumber’s grease to any moving parts, like the O-ring or valve stem. This will help ensure smooth operation and prevent future leaks.
Step 4: Reassemble the Faucet
Once everything is clean and lubricated, reassemble the faucet in the reverse order you took it apart. Double-check all connections to make sure they’re tight and secure.
Step 5: Test the Faucet
Turn the water supply back on and test the faucet to ensure the leak has been fixed. If everything looks good, congratulations—you’ve just saved yourself a plumber’s visit!
Tips for Preventing Future Leaks
Prevention is always better than cure, especially when it comes to plumbing issues. Here are a few tips to help you avoid future leaks:
- Regularly inspect your faucets for signs of wear and tear.
- Clean mineral deposits periodically to keep your faucet in top condition.
- Use plumber’s grease on moving parts during routine maintenance.
- Consider upgrading to a more durable faucet if your current one is prone to leaks.
By following these simple tips, you can extend the life of your bathtub faucet and avoid unnecessary repairs down the line.
Common Mistakes to Avoid
Even the best DIYers make mistakes sometimes. Here are a few common pitfalls to watch out for:
- Not turning off the water supply: This might seem obvious, but forgetting to turn off the water can lead to a big mess.
- Using the wrong tools: Make sure you have the right size wrench or screwdriver for your faucet. Using the wrong tool can damage the parts.
- Over-tightening: While it’s important to tighten connections, over-tightening can cause cracks or breakage.
- Skipping lubrication: Neglecting to lubricate moving parts can lead to premature wear and tear.
Avoid these mistakes, and you’ll be well on your way to a successful repair.
Frequently Asked Questions About Leaky Bathtub Faucets
Still have questions? Here are some common queries about leaky bathtub faucets:
Q: How much does it cost to fix a leaky bathtub faucet?
A: The cost depends on the severity of the issue. For minor repairs, you might only need to spend a few bucks on replacement parts. However, if the problem is more serious, you may need to call in a professional plumber.
Q: Can I fix a leaky bathtub faucet myself?
A: Absolutely! With the right tools and a bit of patience, most people can fix a leaky bathtub faucet on their own. Just make sure to follow the steps carefully and take your time.
Q: How long does a bathtub faucet typically last?
A: On average, a bathtub faucet should last around 10-15 years with proper maintenance. However, factors like water quality and usage can affect its lifespan.
Conclusion
Fixing a leaky bathtub faucet might seem intimidating at first, but with the right approach, it’s a task that almost anyone can tackle. By understanding the common causes of leaks, gathering the necessary tools, and following a step-by-step guide, you can save yourself time, money, and frustration.
Remember, regular maintenance is key to preventing future leaks. Keep an eye on your faucets, clean mineral deposits regularly, and don’t hesitate to replace worn-out parts when needed. And if you ever find yourself stuck, don’t be afraid to reach out to a professional plumber for help.
So, what are you waiting for? Grab your tools, fix that leaky faucet, and enjoy the satisfaction of a job well done. Don’t forget to share this article with your friends and family—because who knows? They might be dealing with the same issue too!